Everybody Needs a (COMFY) Simple Black Leo!

Everybody Needs a (COMFY) Simple Black Leo!

Are you dancing in person these days? For most of last year, my dance company, World Dance Company, was doing virtual rehearsals. It is an interesting challenge to learn choreographies, especially partner work- or formation-intensive choreographies, through live video that sometimes lags!

Well, World Dance Company is finally at a point where we’ve decided to rehearse in person, with masks and social distancing. We rehearse early in the morning, when the studio is otherwise empty and the floor is so cold it makes your feet ache.

I started wearing an old long sleeve leotard with my character skirt to stay warmer (we have choreographies that include skirt-swishing, haha), and I finally told myself that I could make a long-sleeved leo for myself that would be much comfier. So I did!

It was about time for me to make a simple black leo anyway. Everyone needs at least one! I’ve just had so much fun making leotards in crazy colors, I couldn’t bring myself to make a boring one for a while. But comfy and silky and warm really isn’t boring!

Rather than pack this blog post with photos of the process of making it, this time I decided to make it a quick little video, haha. 

This leotard is great for the winter months. Of course, any leotard design can be done with black fabric. If you’re a dancer who has to abide by a dress code, it likely includes black leotards. But in many cases you’ll still have the freedom to spice it up. Do you have a black leotard design you’d particularly like to make?  

At this point, I’ve had a couple of requests for another course with a new leotard. I’ve struggled to decide what leotard should be next, though. Will you help me? 🙂

I would love it if you’d take a second to answer these four questions! Otherwise I’m just guessing about what my people need, haha.

Thank you so much!

Also, if you’re new here, you can start making leotards with me for free by signing up for my free DIY Athletic Leotard Course! Feel free to share with any friends who you think might be interested, too! 😊

Get Free Access to the DIY Athletic Leotard Course!

Trial and Error in Designing Leotards

Trial and Error in Designing Leotards

Today I’m going to walk you through my process of designing, sewing, evaluating and fixing a new leotard. I decided that I needed a sleeveless leotard design, because while I’m sure there are many like me who want more leotards with sleeves, especially cap sleeves (not boxy, straight across the bottom sleeves or long sleeves, but nice-looking short sleeves, please!), I’m also sure there are many dancers who are more warm-blooded than me and just don’t want any sleeves in the way or adding an extra layer of warmth!

So here we go.

Making the Leotard

For this leotard I wanted a fairly basic pattern that still has a couple of nice but subtle design features. This leotard has a seam at the waist, princess seams on the top front, and a little bit of a v-neck. 

Last time I went fabric shopping at JoAnn’s (I’m so lucky to have one so close to home!), I found this new performance fabric with the weirdest/coolest shine to it . . . it almost looks wet. I couldn’t help but try it out, so I got this dark green color.

Last time I wished I’d taken more pictures of the process, so I did that this time. Here I’ve got the princess seams sewn on the outside front piece, and the shoulders sewn together on both the outside and the lining. I love being able to throw more seams on the outside while keeping one smooth, solid piece on the inside. That way I get the design features I want without sacrificing comfort!

Next I sewed the neckline of the outside and lining pieces together. Because it’s a v-neck, I clip the corner about 1/4″ to make it easier to sew it and to keep the shape.

Then I added the elastic to the lining . . .

. . . and I apparently didn’t take any pictures of sewing the armholes or side seams. But that happened! Haha. Then I sewed up the bottom! Voila, top half finished.

The process for the bottom half is quite similar. I sewed the crotch seam of the outside and lining pieces, then sewed the outside and lining pieces together at the legholes. 

Then I added elastic to the legholes, and once again didn’t take pictures of sewing up the side seams . . . huh. But, once again, that happened! Ha. And then I sewed up the top. 

Then I sewed the top to the bottom, and tried it on! 

That, of course, was oversimplified, but this post isn’t meant to be a tutorial. It’s more for giving you a general idea of the process. However, let me know—would you like to buy a course to teach you (in much more detail) how to make a leotard like this?

Evaluating the Leotard

Alright, so I finished the leotard and tried it on, and was . . . disappointed!! Hahaha.

It wasn’t terrible or anything, but I do tend to be a bit of a perfectionist, and it wasn’t quite what I was going for. But here’s the thing—it’s totally okay to make a leotard and find that it’s not exactly what you wanted. It’s all part of the process and you can always learn from it. And truthfully, it’s still a pretty functional leotard, with just a couple tweaks. 

Problem #1: The Straps

The straps on this leotard came in far enough from the shoulders that they didn’t cover my bra or tights straps (I like full body tights with straps because they don’t dig into my waist). I’m sure this wouldn’t bother many dancers, but for me I wanted a nice clean look that doesn’t require me to tuck my straps in unnaturally to hide them.

I can’t fix that with this leotard, but the next time I make a leotard pattern I can just bring the straps out further and widen the neckline. No big deal! 

Problem #2: The Waistline Seam

Again, not the worst problem in the world, but for some reason this fabric behaved oddly on the seamline. The waist seam just really wanted to stick out funny on the back. I still don’t know why!

But, you’ve got to expect that when you try out a new fabric, some unexpected things might happen. If I use this type of fabric for a leotard again, I’ll probably try having a seam under the bust instead of on the waist. It might be a problem there too, but I think it might hide better there.

Problem #3: The Leghole Elastic

So the biggest problem by far with this leotard was that the elastic on the legholes was popping out on the bottom and showing the lining. That was especially disappointing because I’ve worked so hard to design my leotard patterns so that won’t happen.

However—as I explain in my free DIY Athletic Leotard Course—you have to make sure that your outside fabric is as stretchy or stretchier than the lining fabric!! Guess who forgot to follow her own advice with this new shiny fabric?

Ya it was me.

I saw the shiny fabric and went, “MINE,” before really thinking about it. Haha. It seems that it’s a bit less stretchy than the lining, and that created this annoying issue.

The good news is that problem #3, the biggest problem, is also the one that was easiest to fix on this leotard. So I didn’t have to start over and make a new one! This might be helpful to you in case you ever have the same issue!

Fixing the Leotard

The legholes were just fine in the front, the problem was only in the back. So I turned the leotard inside-out, flipped it to the back, and pulled the lining up just enough to match a fold to the waist seam. You can see when I fold it down that the lining is not sticking up past the seam.

I also didn’t do this all the way to the side seams—my side seams already matched up nicely and I didn’t want to mess with that, so I just tapered the new serge on and off a little ways away from the side seams.

Guess what? The elastic was still popping out. 

So I did it again!! And serging the fold of lining onto the seam the first time made it really thick, so this time I shaved off most or all of the previous seam to make it less bulky. I was also hoping that this would help problem #2 by taking away a little of the excess fabric on the back and making it lay smoother. I think it did help a bit.

It was better this time, but I still couldn’t trust the elastic to stay put, so I did this process a THIRD time, which is kinda crazy. But good news, it worked!! (I didn’t take pictures this time because I didn’t think you needed a third set of pictures of exactly the same thing, haha). 

So now, thankfully, my leotard is functional, the biggest problem is fixed and I can wear this leotard. Yay! And I can still modify my pattern in the future to have a better version of this leotard.

I took these pictures to show you what the waist seam looked like on the inside after pulling it up 3 times. On the back next to the side seam, it’s not super pretty. But I can’t feel it when I wear it, and you can’t see it at all from the outside. That’s one of the great things about stretch fabrics—they’re much more forgiving, so you can pull off little fixes like this.

t’s maybe not ideal to have a seam look like this on the inside—I wouldn’t sell this or anything. But for a leotard I made for myself, I’m pretty happy with it, especially since at first it wasn’t a functional leotard with that elastic sticking out, and now it is! I’m glad I can still wear it.

If I were to use this fabric for another leotard, I would want to account for the stretch and modify the lining pattern for the bottom back piece to be shorter, so it has to stretch more and will be tighter than the outside, pulling the elastic securely to the inside.

With this post I wanted to show you that it’s okay to make mistakes while designing leotards. You’ll never design something awesome if you’re not willing to make some mistakes to get there. And, like I’ve shown you, not all mistakes mean the leotard isn’t wearable. Sometimes you can find a quick fix rather than making another leotard from scratch. 😊

Alright, that’s all for now—if you haven’t yet, I hope you’ll consider making leotards with me! You can start for free by signing up for my DIY Athletic Leotard Course! I’ll show you how to get through the trial and error process of making your own custom leotard pattern using your body measurements. In this case we’ll make all the corrections BEFORE cutting out and sewing your leotard, haha! 

Get Free Access to the DIY Athletic Leotard Course!

Princesses, Peasants, & Leotards

Princesses, Peasants, & Leotards

Secretly, I’ve been thinking about doing this for a long time—making princess-inspired leotards. 😊 I’ve drawn lots of princess leotard designs, but this is my first time actually sewing one!

I thought Halloween was a good time for it. I won’t actually be wearing this leotard today—I’m wearing my Supergirl costume! That one is more of a full-on costume that I probably wouldn’t want to wear to a dance class (ugh, dancing with a big pleather cape, haha), but is great to wear once a year to Halloween events. This leotard is the opposite—it’s super comfy, easy to move in, and totally practical for wearing to a dance rehearsal, on Halloween or any other day of the year!

Anyway, you might notice that this leotard looks more peasant-y than princess-y. It is! But it was inspired by a certain Briar Rose, a peasant girl who is unknowingly a princess, and who looks every bit as beautiful, graceful, and princess-y in her simple peasant dress. 

I actually made a pattern for a princess leotard to go with the peasant leotard, but JoAnn’s didn’t have the fabric I needed for it! (I’ve used up too much of my bright pink lycra, haha!! 😆 It’s so fun.) So, the princess leotard very well may be a part two for this blog post. 😁

Here are a few pictures from the process of making this peasant leotard!

First, the pattern. The peasant pattern is on the left, and just for fun I’m showing you my princess pattern, on the right, even though I haven’t sewn it up yet. Of course these are just the outside pieces. There are also lining pieces, which are the same overall shape but not as many pieces. There’s no reason for all those seams on the inside.  

I was so excited to make the peasant leotard—I just think the shape, especially of the corset part, is so pretty. So, even though I didn’t have all the fabric I needed, I took scraps and hoped to make it work, haha! That meant no sleeves, and the shirt part on top had a middle seam, which is not great for the look or the logistics of sewing it together, haha.

It was a good trial run, though, and it helped me figure out what I needed to do to make it work for the real thing, haha. I normally don’t work with such interesting acute angles and whatnot, especially in the center of the pattern, without a seam, and with stretch fabrics. That was interesting. 

I finally went and bought new fabric, cut out the pieces again (the right way, haha), and started again. 

It was very helpful to not have a seam in the middle to try to match up exactly to the point, haha. I also did some reinforcement stitching on those three points on top so I could safely clip to the corner and pull the funky shapes around to match each other. I probably should have taken pictures of these details in the process. I’ll think about that next time. 


Oh! Another detail I should definitely mention—sewing these angles nicely with a serger was NOT going to happen, haha! So for this seam, even though it takes longer, I used my normal sewing machine and a triple straight stretch stitch (say that ten times fast. Even if you say it right it still feels wrong, hahaha 😜). I think for every other seam I used a serger.

Most of the rest of the process was very much the same as my usual process that I use in my DIY Athletic Leotard Course. The bottom V point of the corset was a little interesting as well, but not bad, and it worked out just fine with a serger. I was glad I didn’t have to use the triple straight stretch stitch for that (just needed another excuse to make you try to say that, haha 😄).

Aurora top finished

I didn’t even take any pictures of making the bottom, because it was the same as usual, haha. And I was too anxious to finish to stop! So the next picture is one of the finished product, in the woods, where the person wearing it might hang out with animal friends and tell them about her dreams of a handsome prince. 😉❤️️

There are so many fun things you can do with leotards. And they can be COMFY!! That’s one of the best parts. If you want to learn to make your own leotards, sign up for my free DIY Athletic Leotard Course! It’s a 3-day course (but you can take it as fast or slow as you want) with in-depth, step-by-step videos and written instructions to help you feel confident that you’re doing it right and will get a great result. 😊

Thanks for reading, and watch out for part two, with the princess leotard!

Get Free Access to the DIY Athletic Leotard Course!

How to Sew Your Own Leotard

How to Sew Your Own Leotard

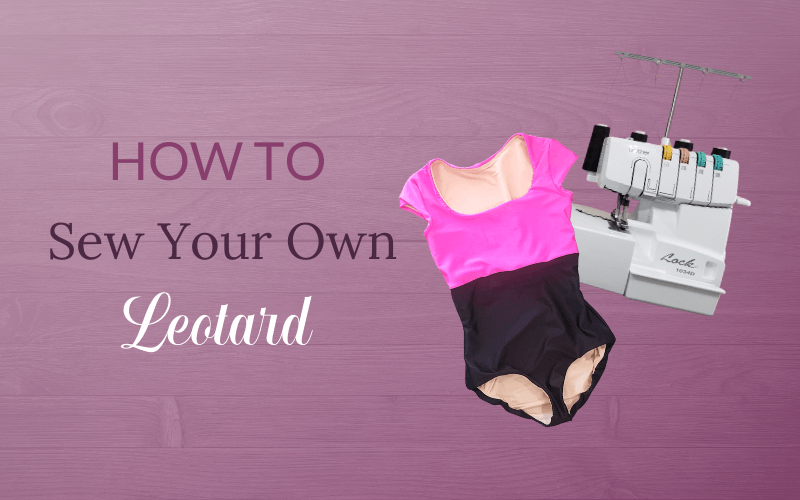
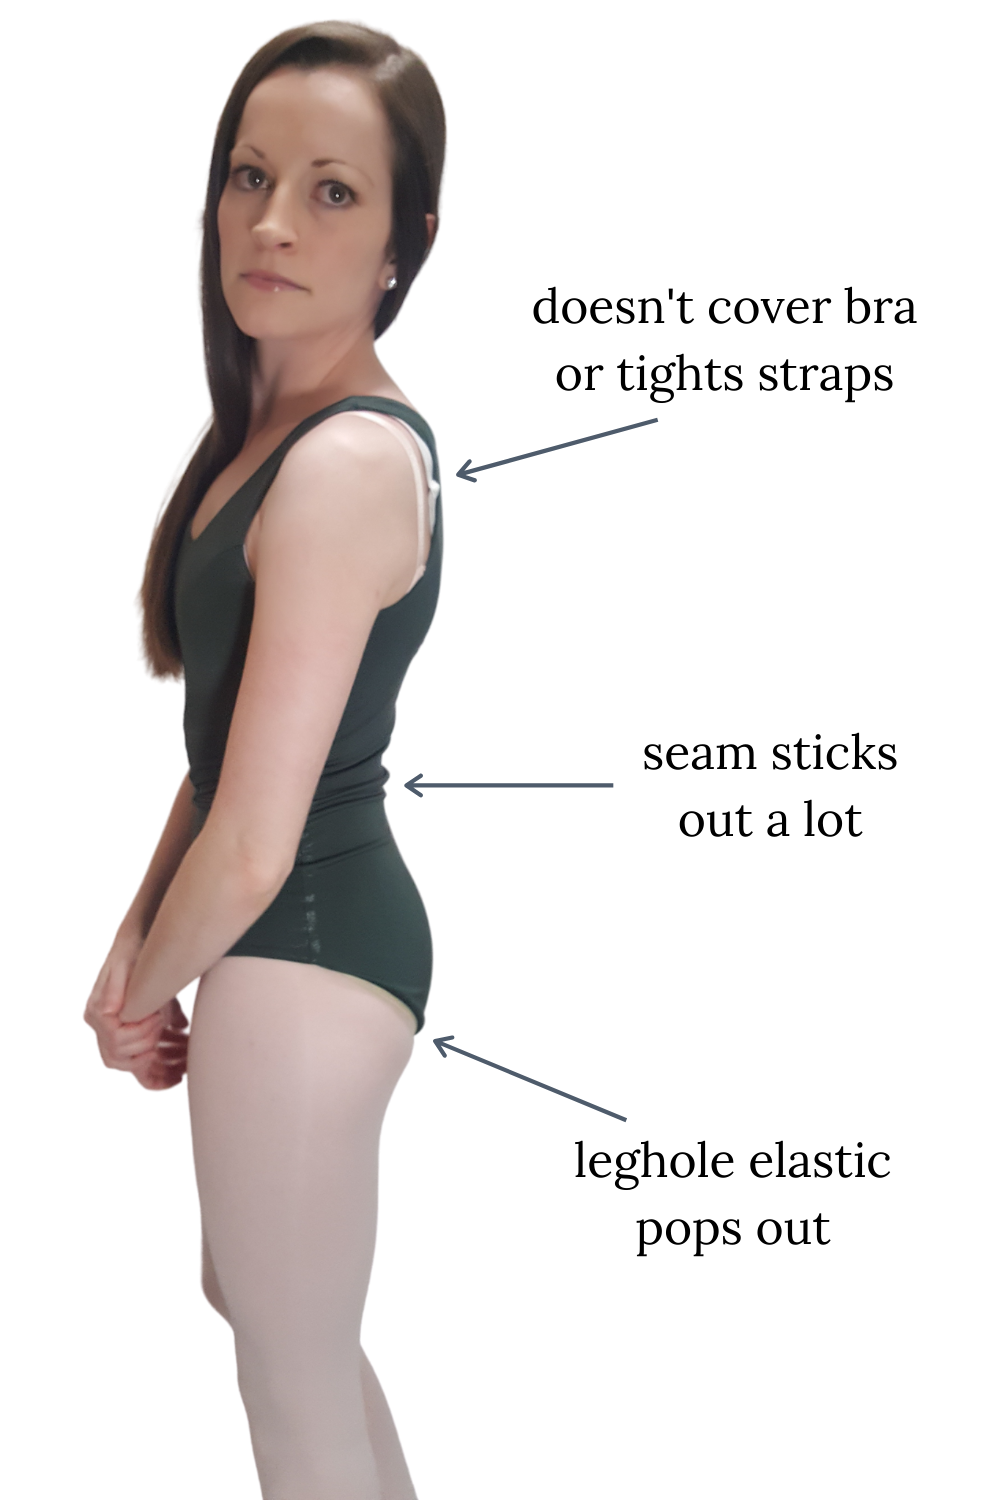
I’ve talked before about why you should make your own leotards. My last blog post was about how to start, by making a customized basic leotard pattern that you can use over and over to design new leotards. Today I’m going to tell you more about how to actually sew a custom-fit, comfy leotard together!

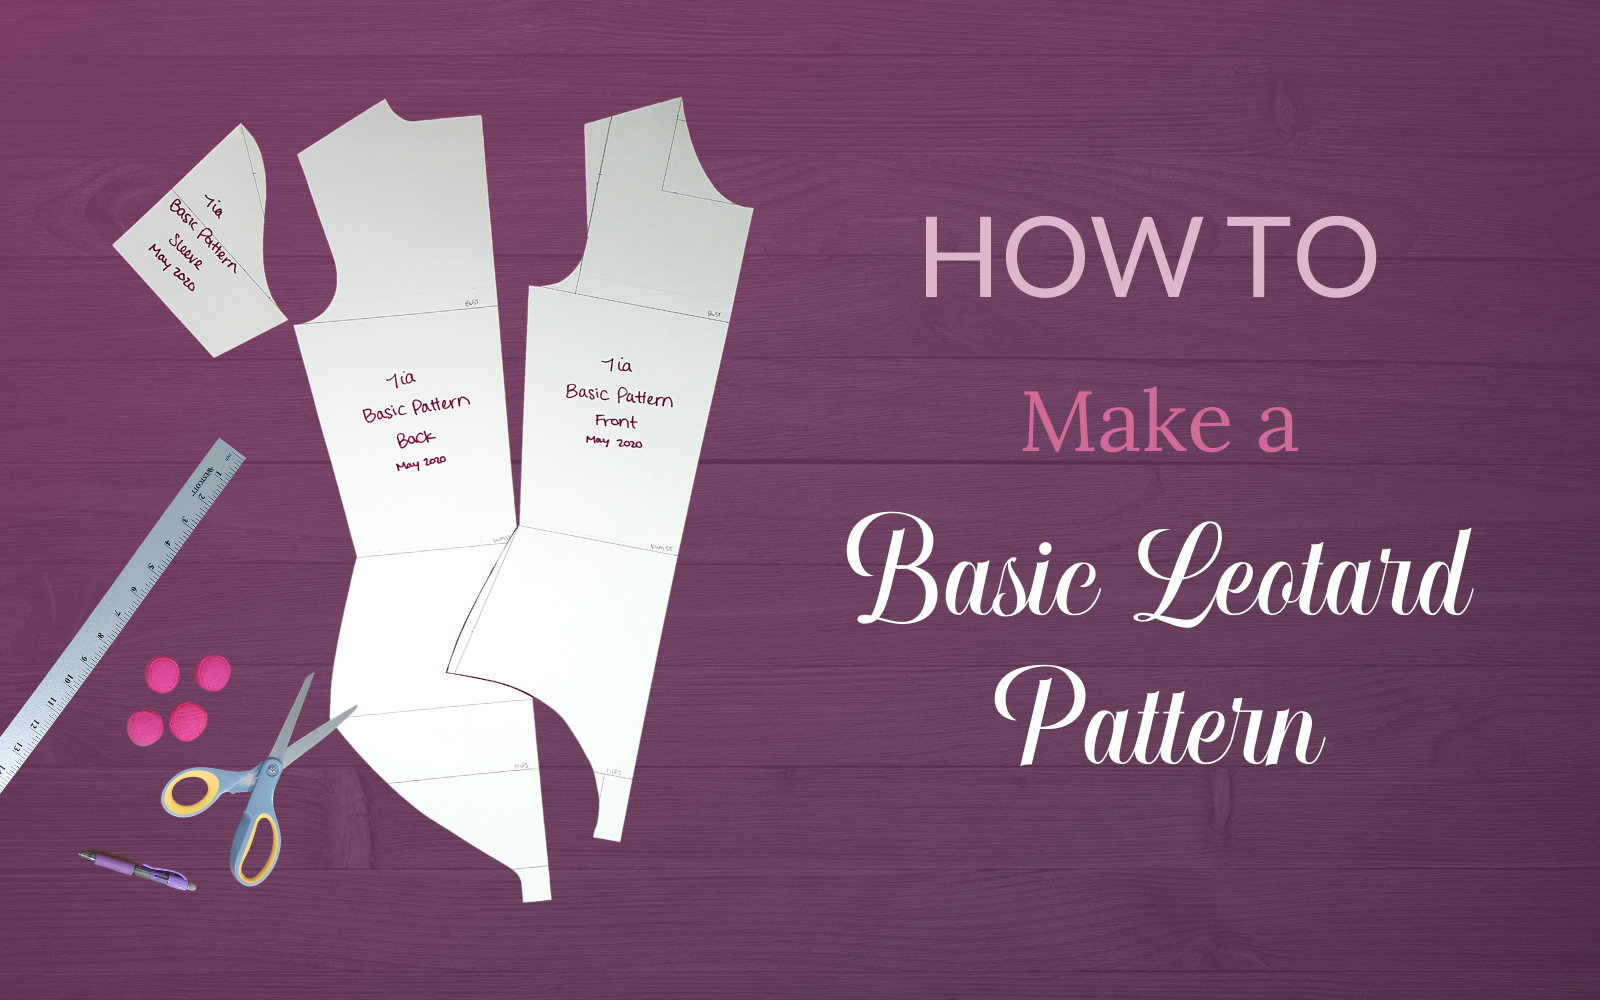
Separate the top, bottom, and lining pattern pieces

The first thing I like to do is separate all my pattern pieces into piles according to which fabric I will use. For the leotard I make in the DIY Athletic Leotard Course, the top is pink, the bottom is black, and then there’s the lining. 

Divide the pattern pieces into piles so that you won’t absentmindedly cut the wrong piece out of the wrong fabric. I’m especially likely to make this mistake with the outside pieces and the lining, since they’re so close—they’re almost exactly the same shape, but slightly different sizes. Taking this extra step helps us avoid human mistakes that will cause us grief later. 

Cut out the fabric

After we’ve got our piles, we take one at a time and cut out the pieces with the right fabric. It’s important to be consistent—decide which side of the fabric is the right side/outside and stick to it, and decide which side is the top and which is the bottom and stick to it.

When I cut out pattern pieces, I tend to start with the biggest and go to the smallest so that I can use my fabric as efficiently as possible. I suggest you do the same to avoid having an oddly shaped, too-small piece of fabric to try to fit your larger pattern pieces into.

Lay out the pattern pieces, right sides together

Once all the pieces in all the fabrics are cut out, lay them out right sides together, the way they will be sewn together. Especially if there’s not an obvious right and wrong side of the fabric, doing this now helps again with not making human mistakes later.

Thread the machines

Next, thread your machines—my coverstitch machine pretty much always has thread that matches my lining, since the stitching is only seen on the inside. We thread the serger with thread that matches the outside fabrics. 

Of course, a regular sewing machine with a zigzag stitch can also be used to sew the leotard. I prefer a serger and coverstitch machine for many reasons, but if you only have a regular sewing machine or feel intimidated by the heavier duty sewing machines, don’t let this hold you back!

One of the things that intimidates people about these machines is threading them. It is a bit more complicated, with 3 or 4 spools instead of just 1 spool and a bobbin, but it’s really not difficult to learn and the perks of sewing with these machines are definitely worth it, if you ask me.

Sew the shoulders and neckline

Now we finally start sewing! We sew across the shoulders, on the outside fabric pieces and the lining. Then we put the two right sides together.

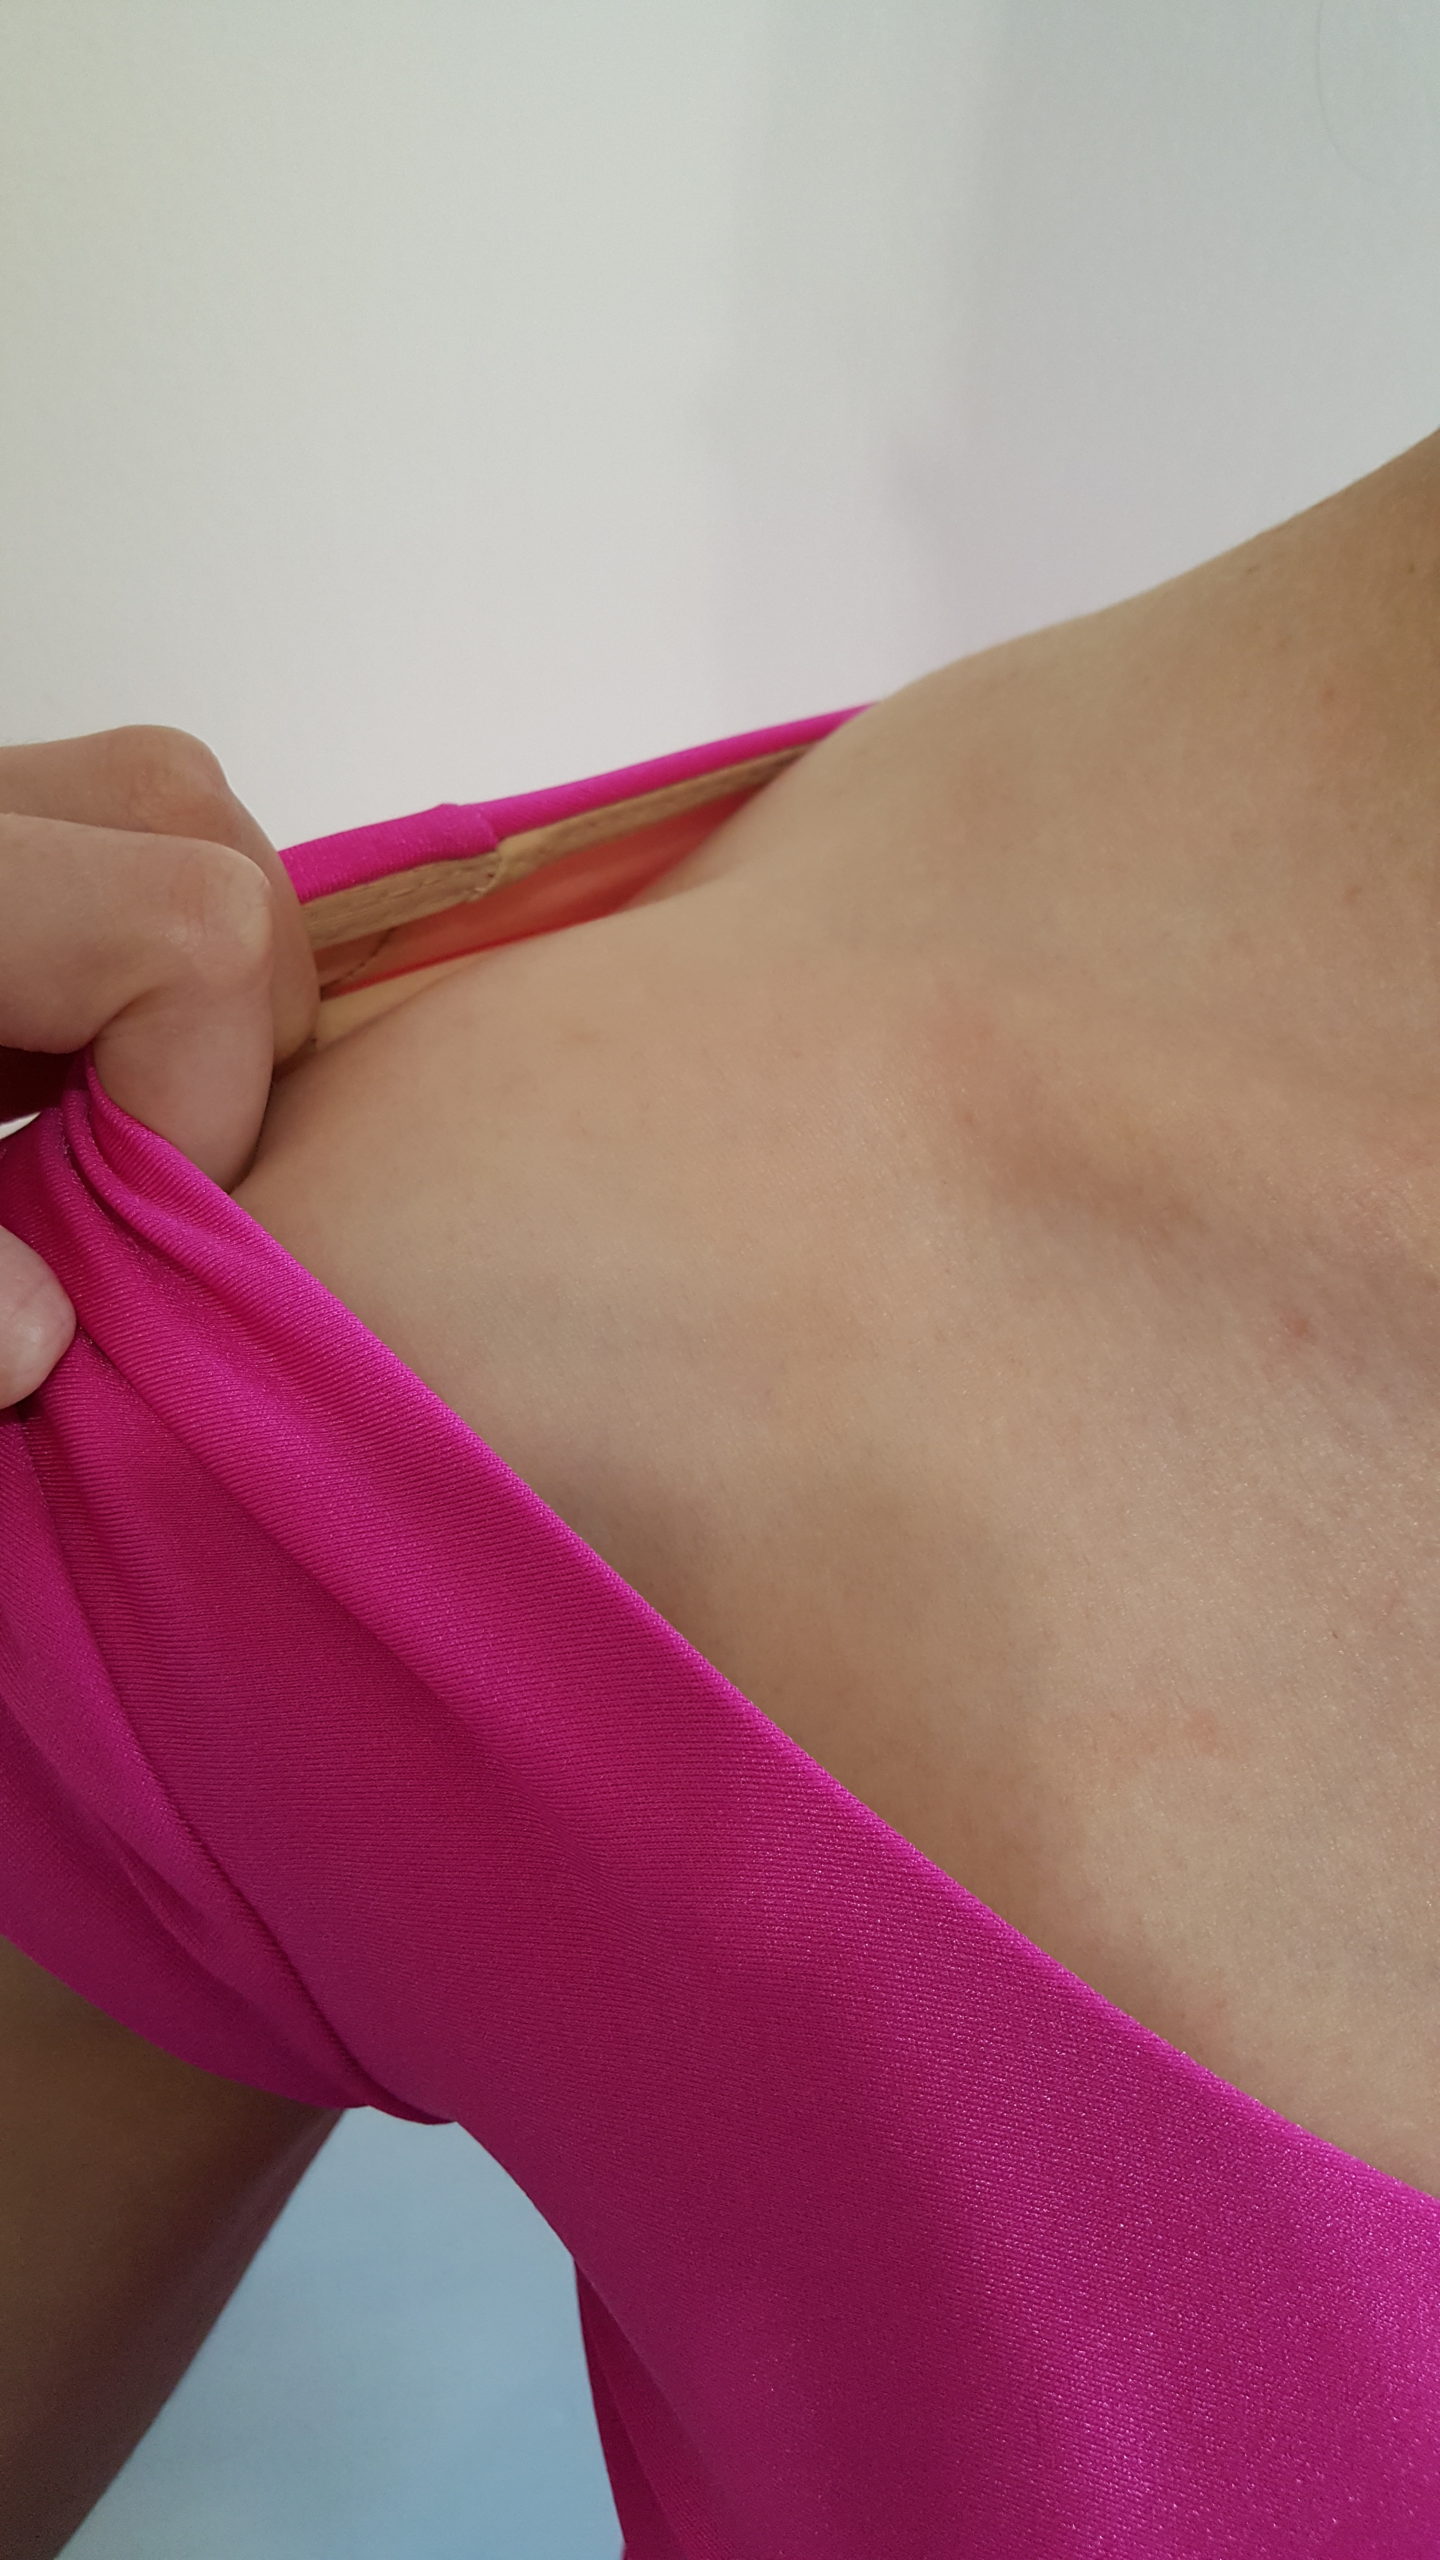
Next we sew around the neckline. The neckline can use some extra security, so this is one of the places we put elastic. The elastic is a bit shorter than the circumference of the neckline so that it will be snug.

We pin the elastic to the neckline and then serge it on!

Where we sew on elastic, we also do what I call coverstitch understitching, haha. We understitch (sew the seam allowance to the lining) with a coverstitch machine to help pull the lining to the inside and give the neckline a smooth, crisp edge.

Sew the sleeves and side seams

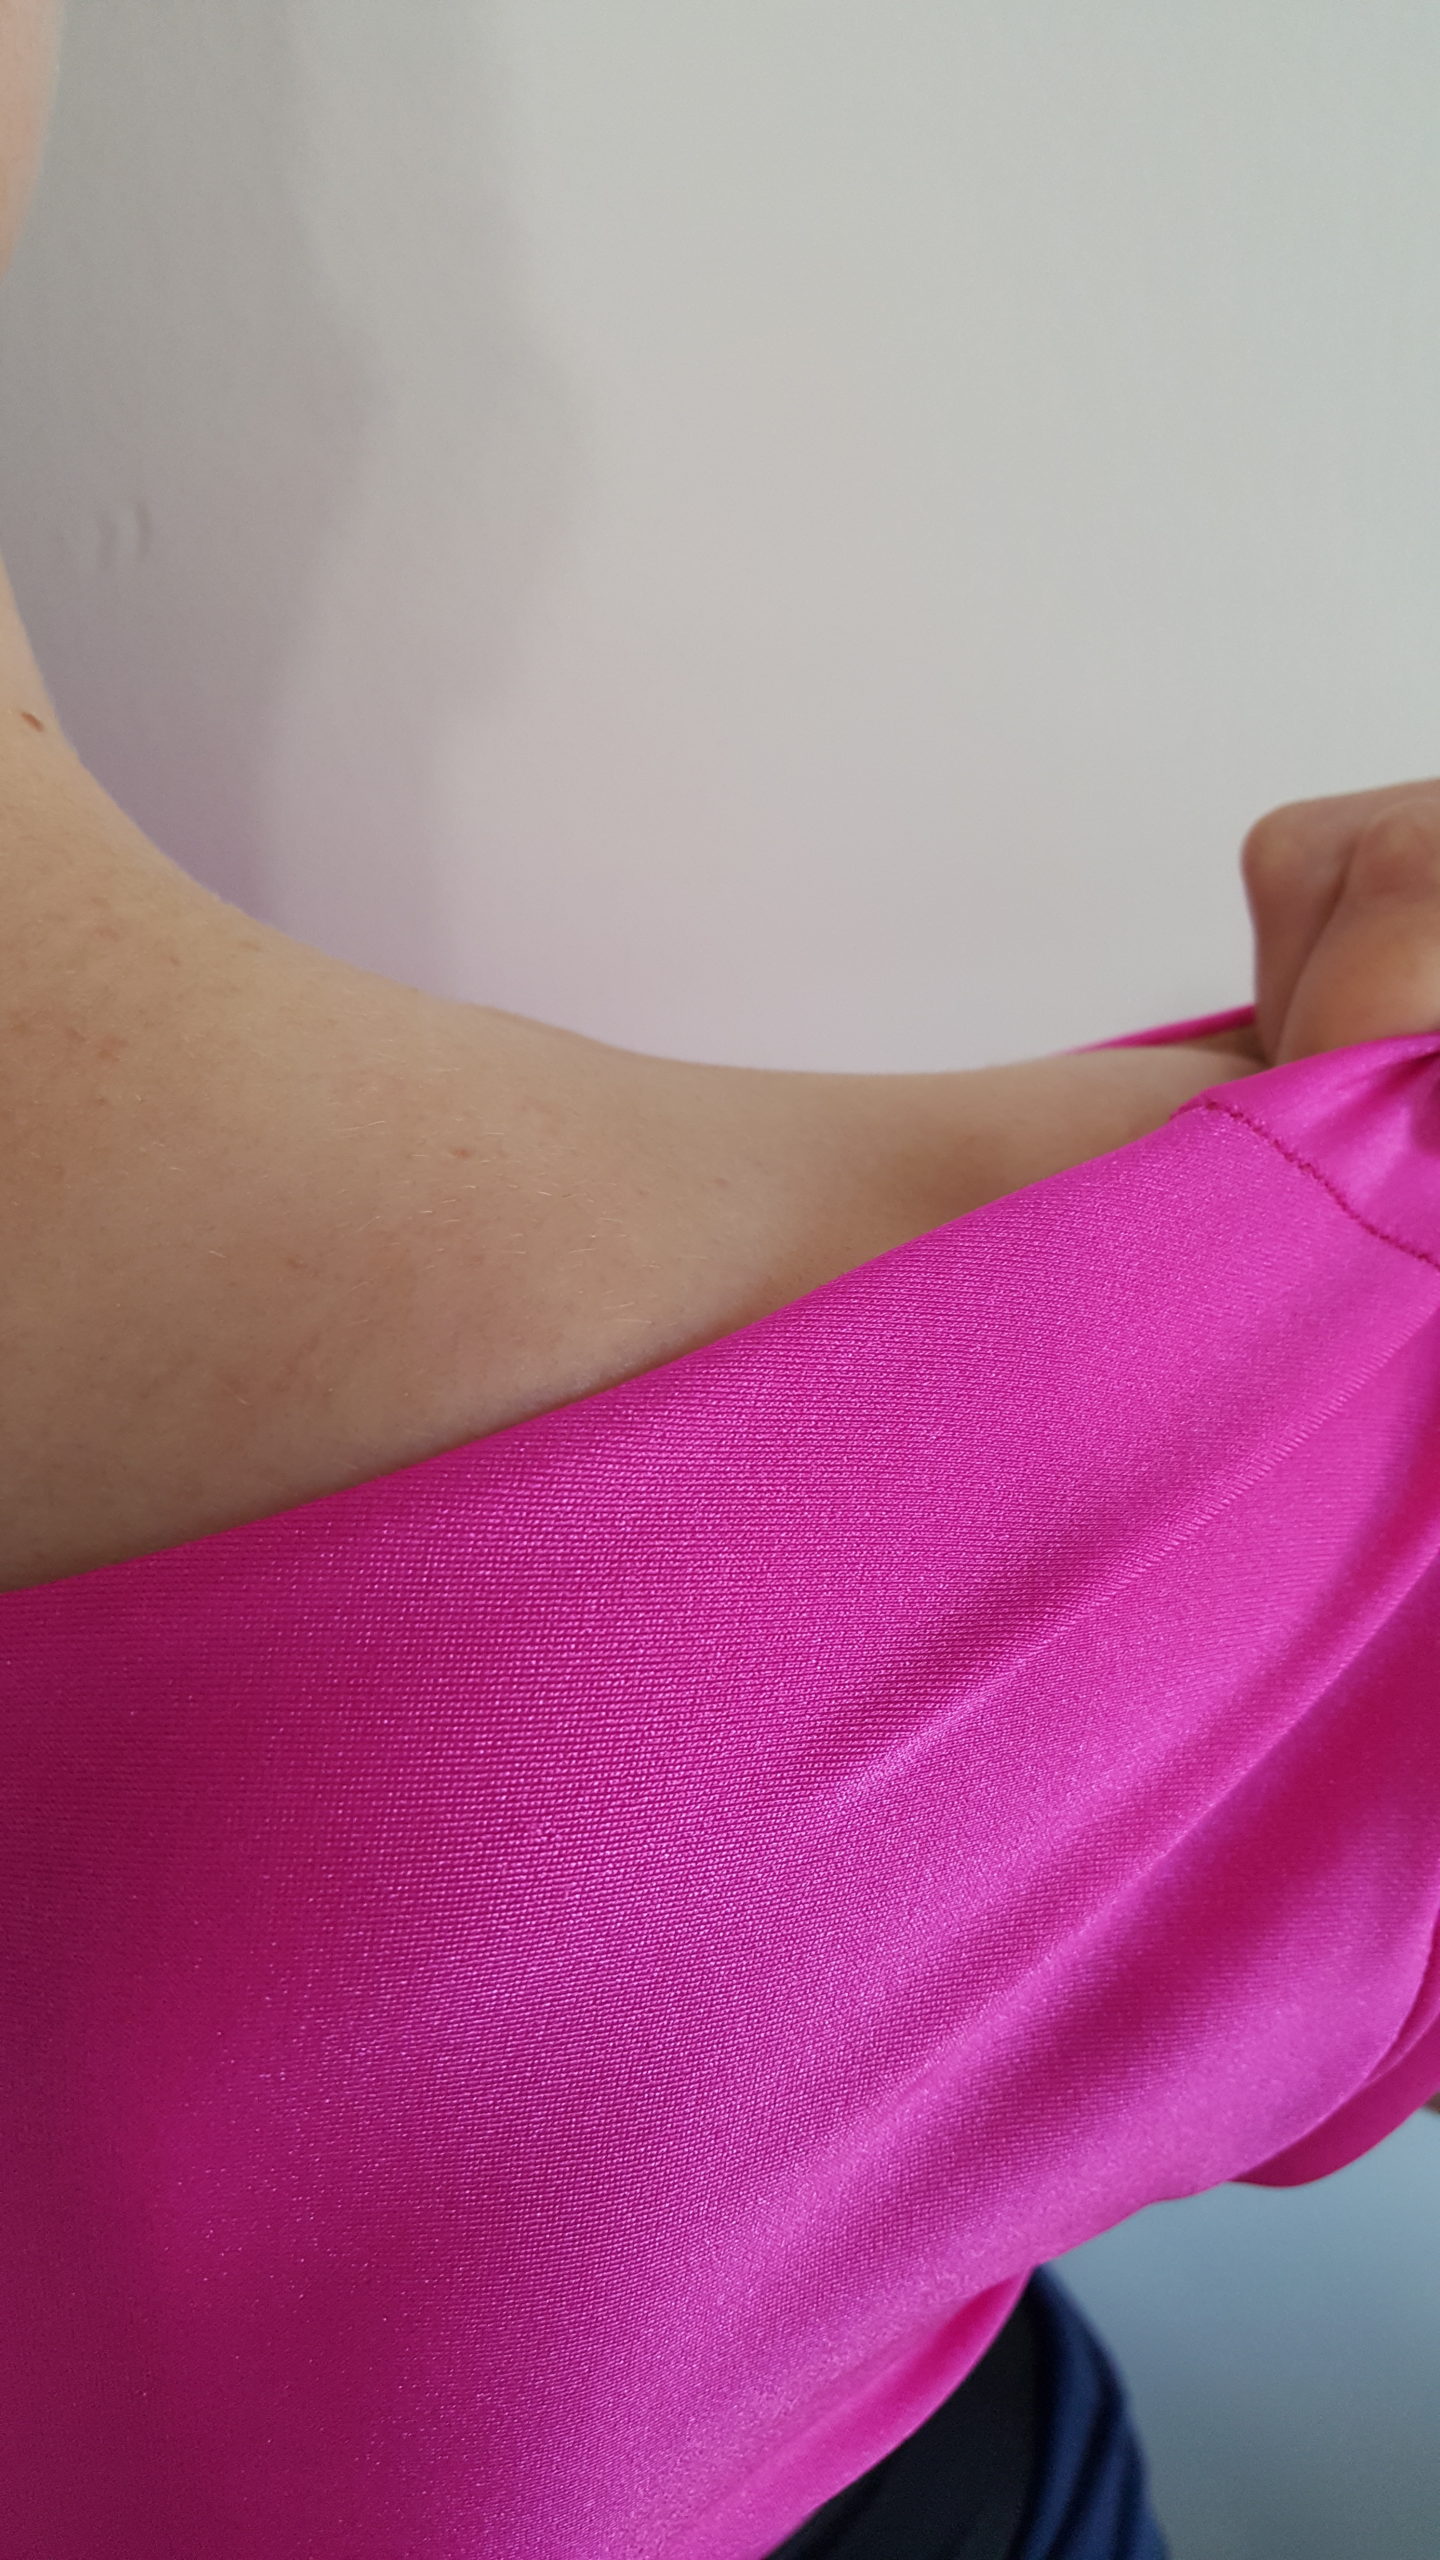
Next we pin on and sew the 4 sleeves—the 2 outside and the 2 lining sleeves. I use a pin to match up the center of the sleeve cap to the shoulder seam, and then I stretch and manipulate the fabric to make the sleeve match the armhole, and sew. Of course you can use more pins if you’re more comfortable with that.

Now it’s time for some burrito-style sewing, haha. We wrap the inside and outside pieces of a sleeve around the rest of the top of the leotard to meet each other, right sides together, and sew them. Then we turn them inside-out and find a lovely sleeve with enclosed seams! It’s disorienting but magical. 😉 We repeat for the other sleeve.

Then we flip the leotard around in another way that feels inside-out and backwards in order to sew one side seam of the top together, and then the other.

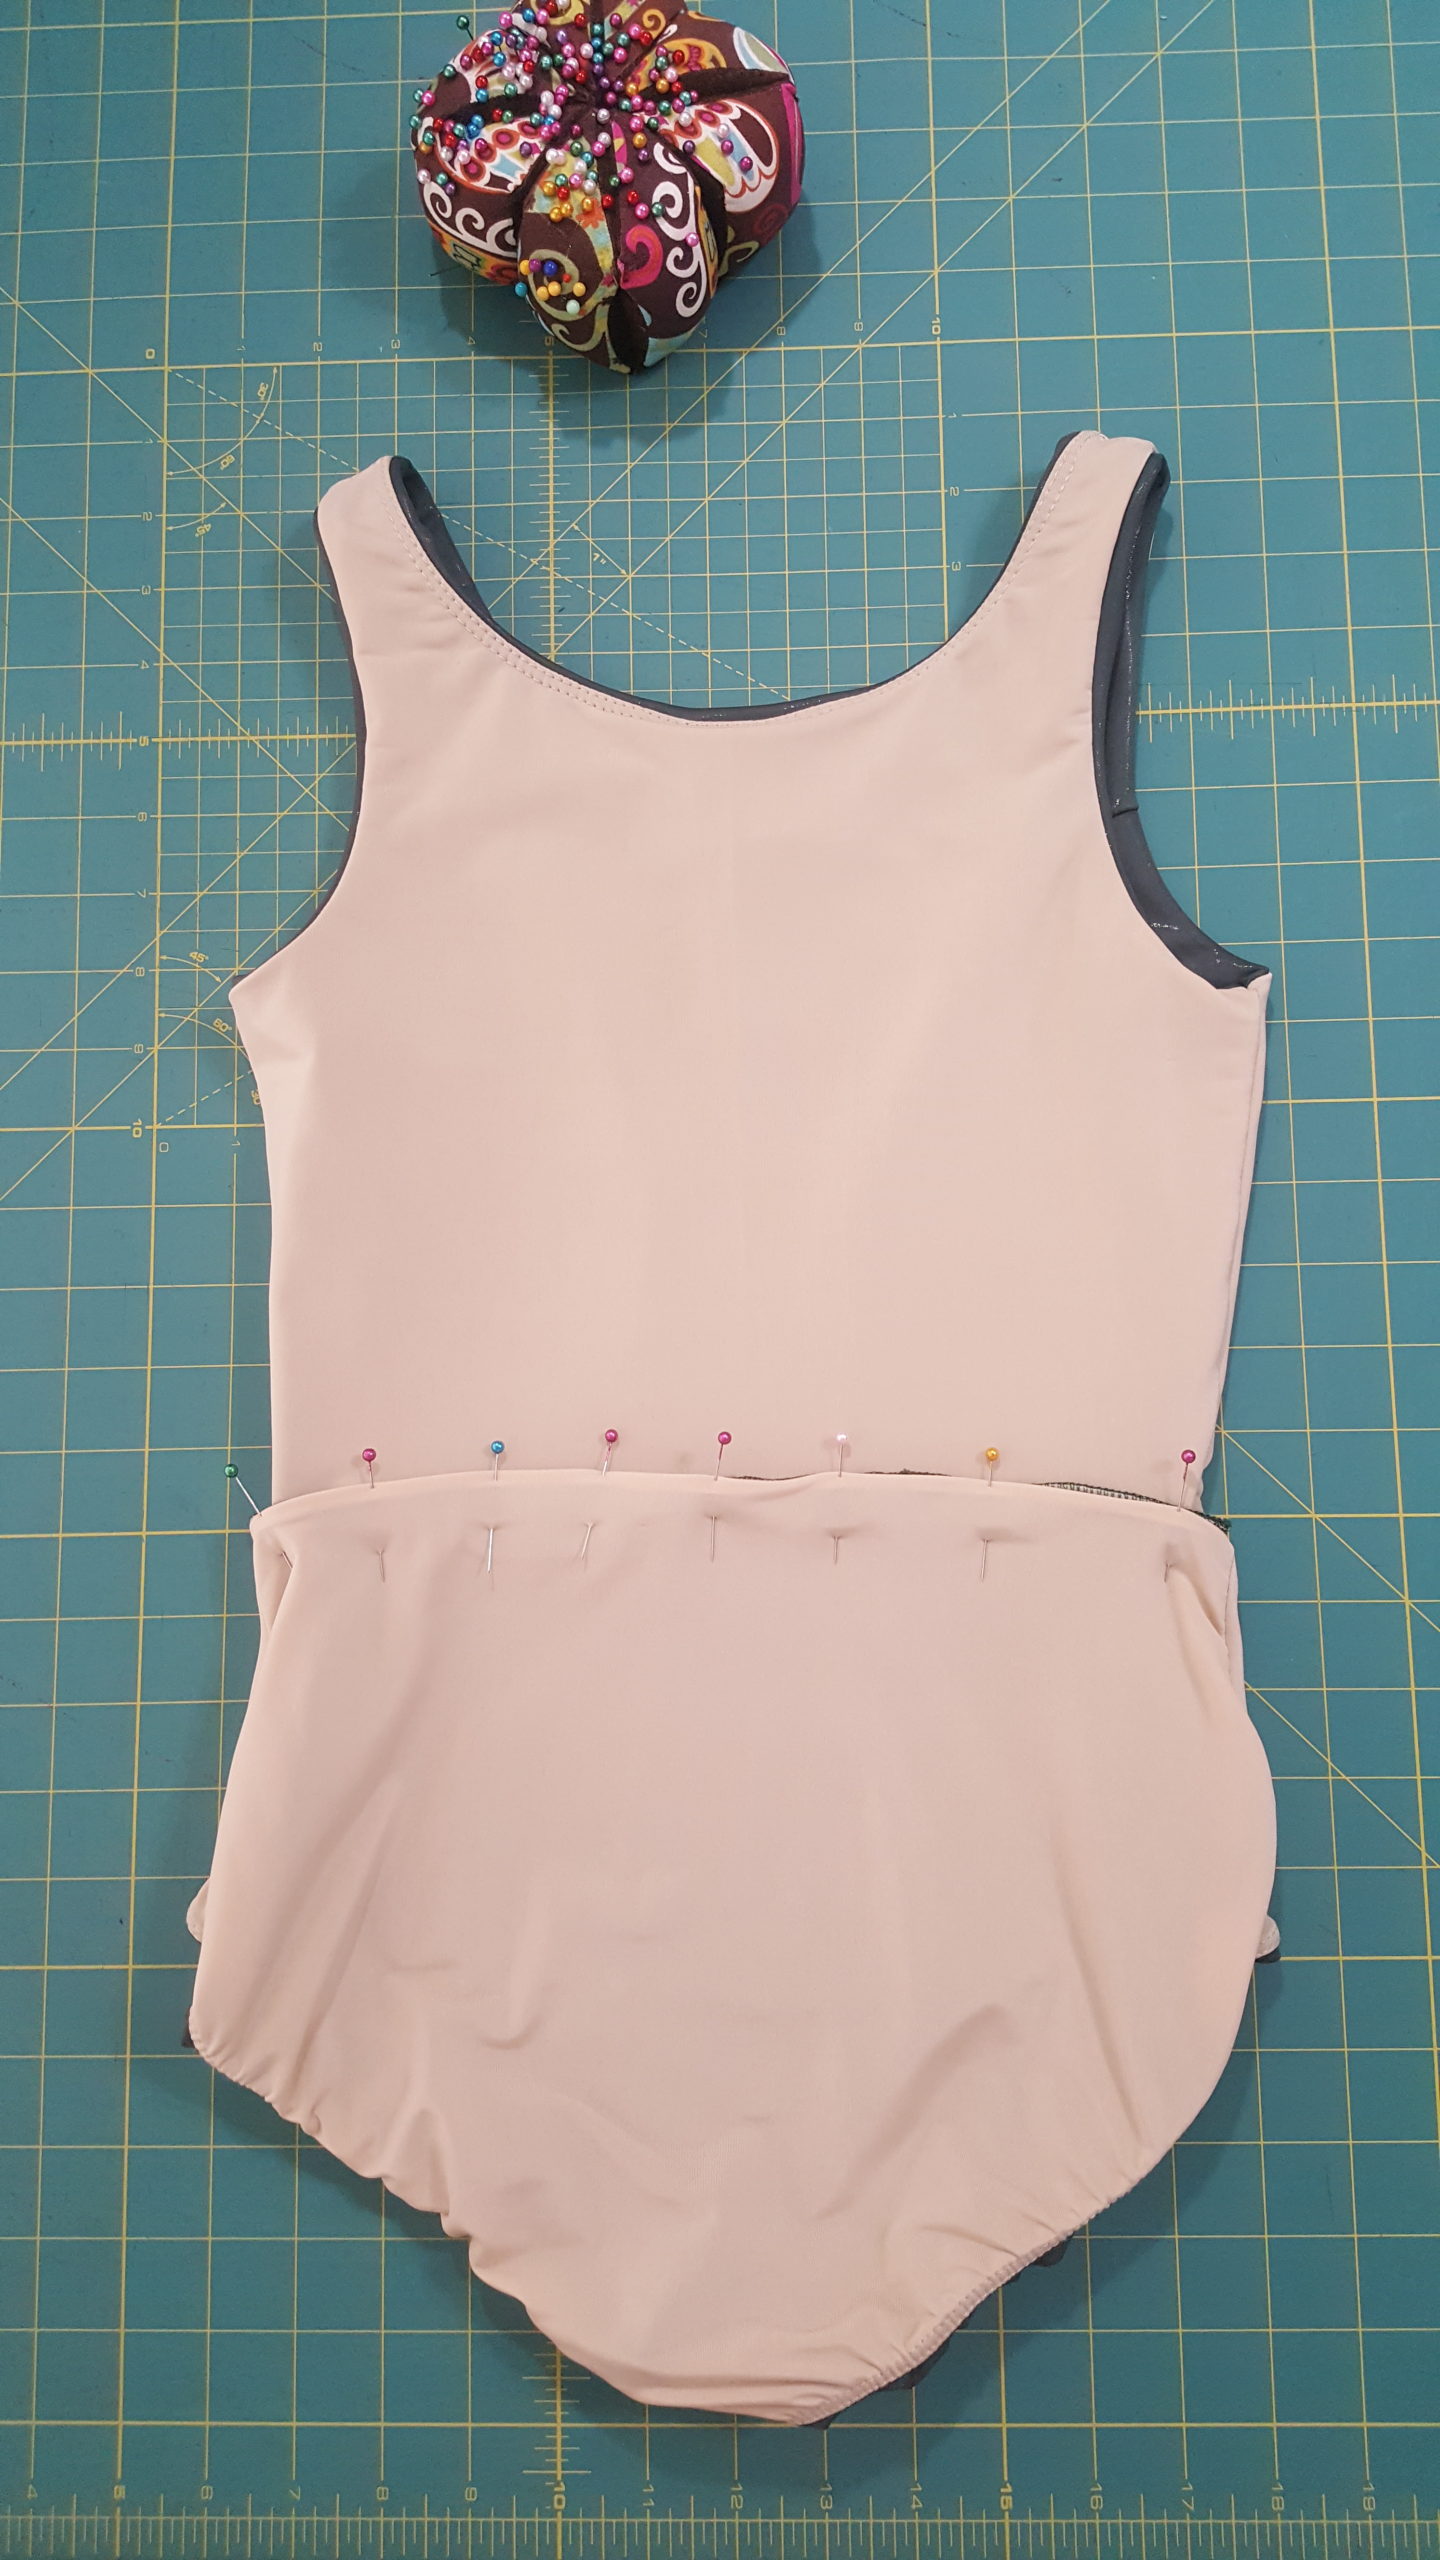
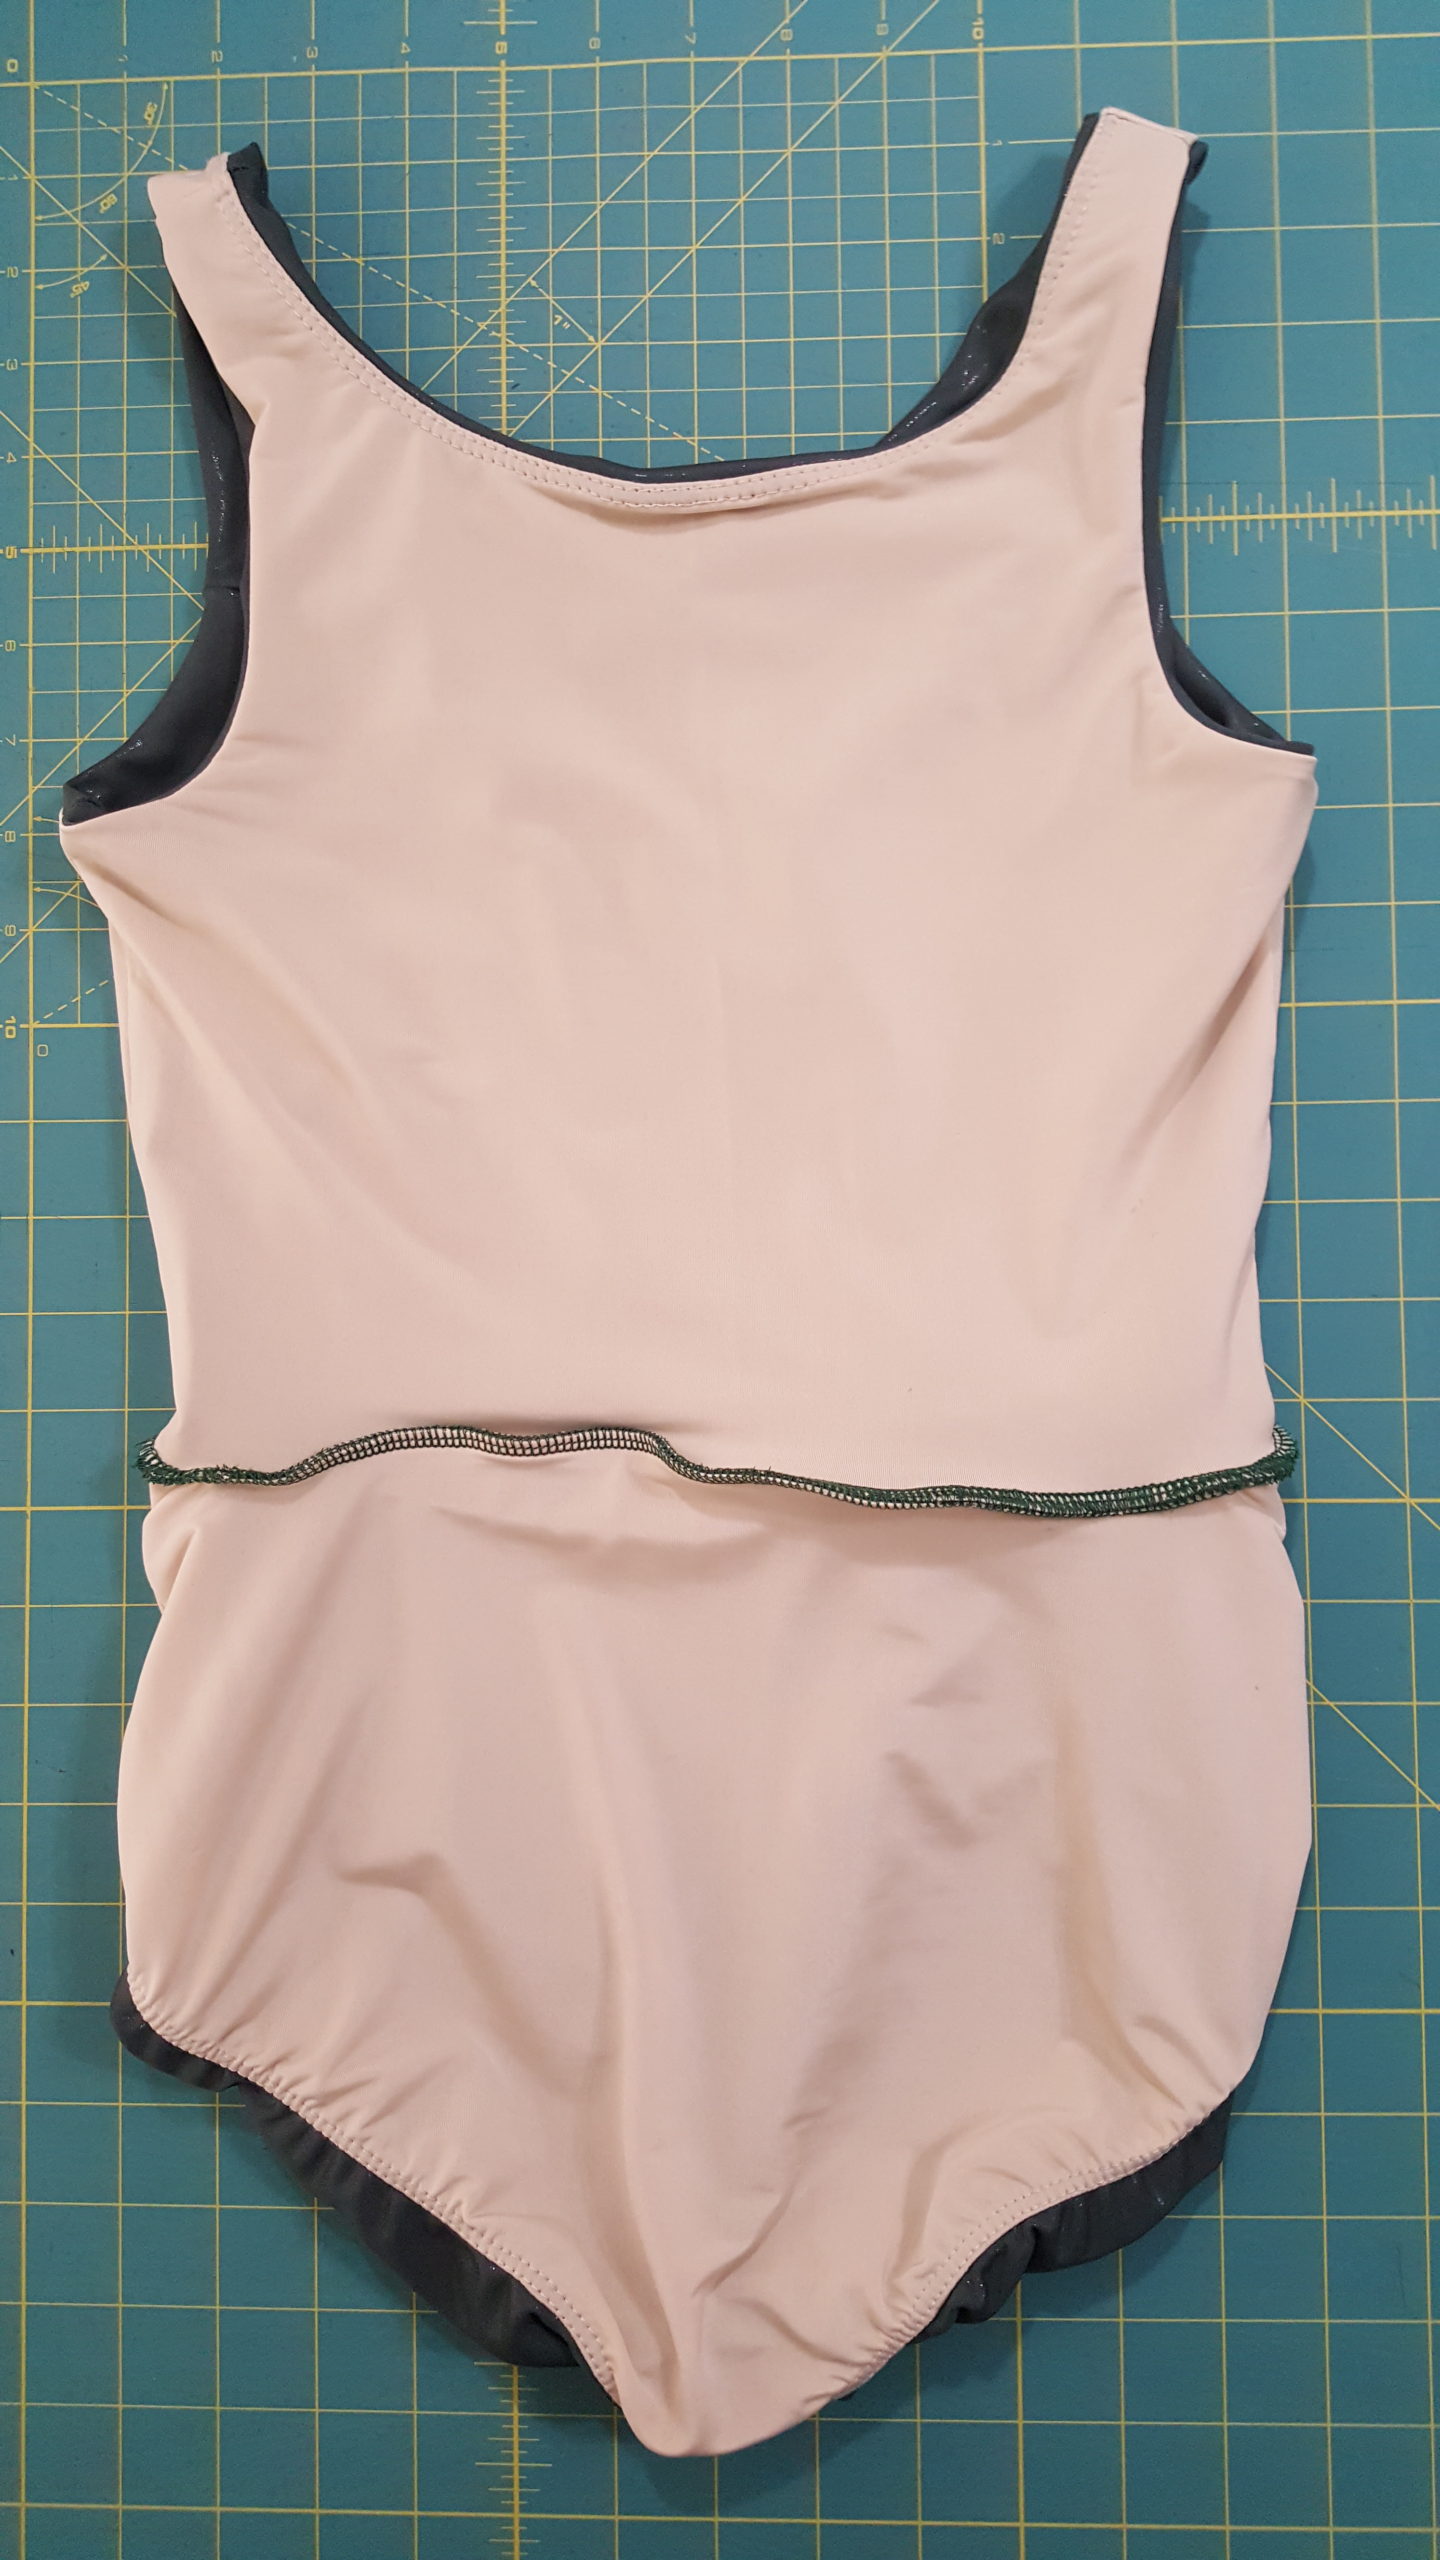
To finish the top, we sew the outside and the lining together around the bottom. 

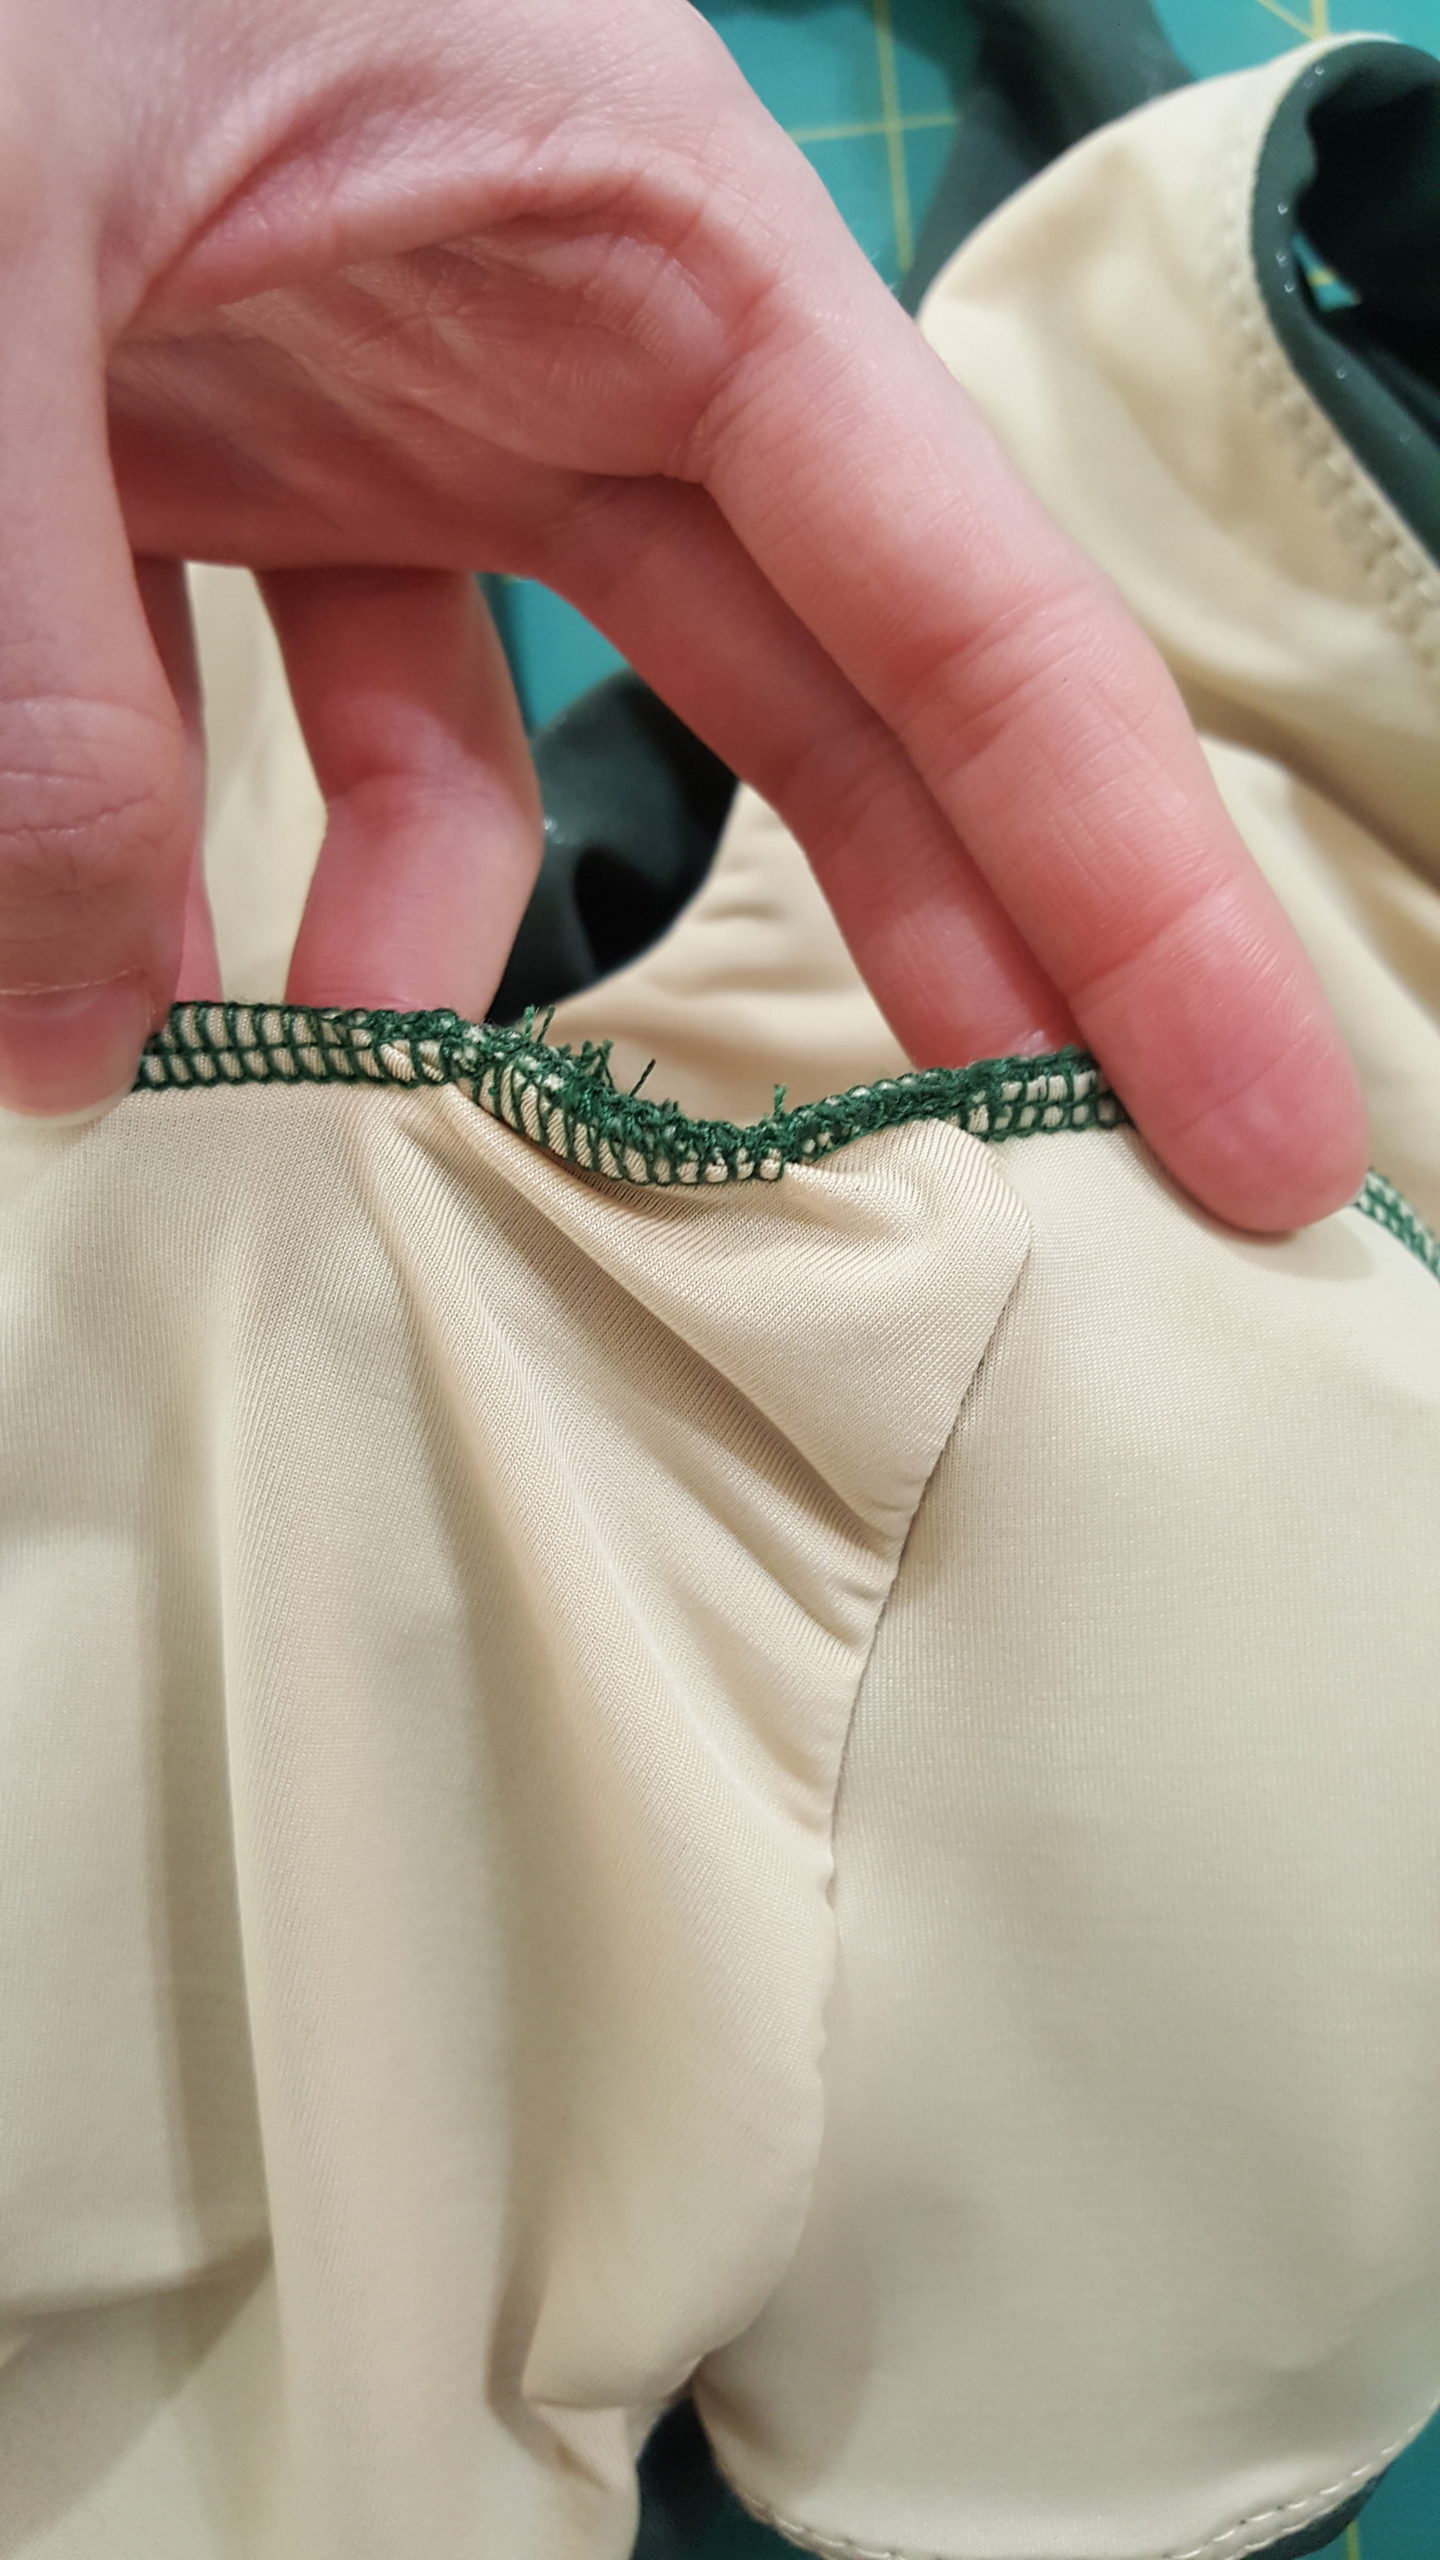
Sew the crotch and the legholes

Now we do almost the same thing as we did on the top, but upside-down. We start by sewing the crotch pieces together on both the outside and the lining pieces. Then we put the lining and the outside pieces right sides together.

Next we sew the legholes of the lining and the outside together. If you’ve ever sewn a leotard before, you know this seems out of order. Usually you sew the legholes last, but we change the order to give the leotard comfy, silky, enclosed seams.

Like we did on the neckline, we measure elastic, pin it to each leghole, and sew it on. We make the elastic even shorter this time, because the legholes need quite a bit more security than the neckline does. We barely stretch the elastic at all on the front of the legholes, but we stretch it out a lot more in the back.

Once again, we coverstitch understitch the elastic to the lining. It’s a bit more involved this time, because we have to sew through the rather skinny crotch tunnel. This means that we sew as far as we can from one direction, then we pull it out of the machine and come in from the other side to finish. We do this on both legholes. 

Finally, we reach through the crotch tunnel and pull the fabric right side out. The hardest part is over!
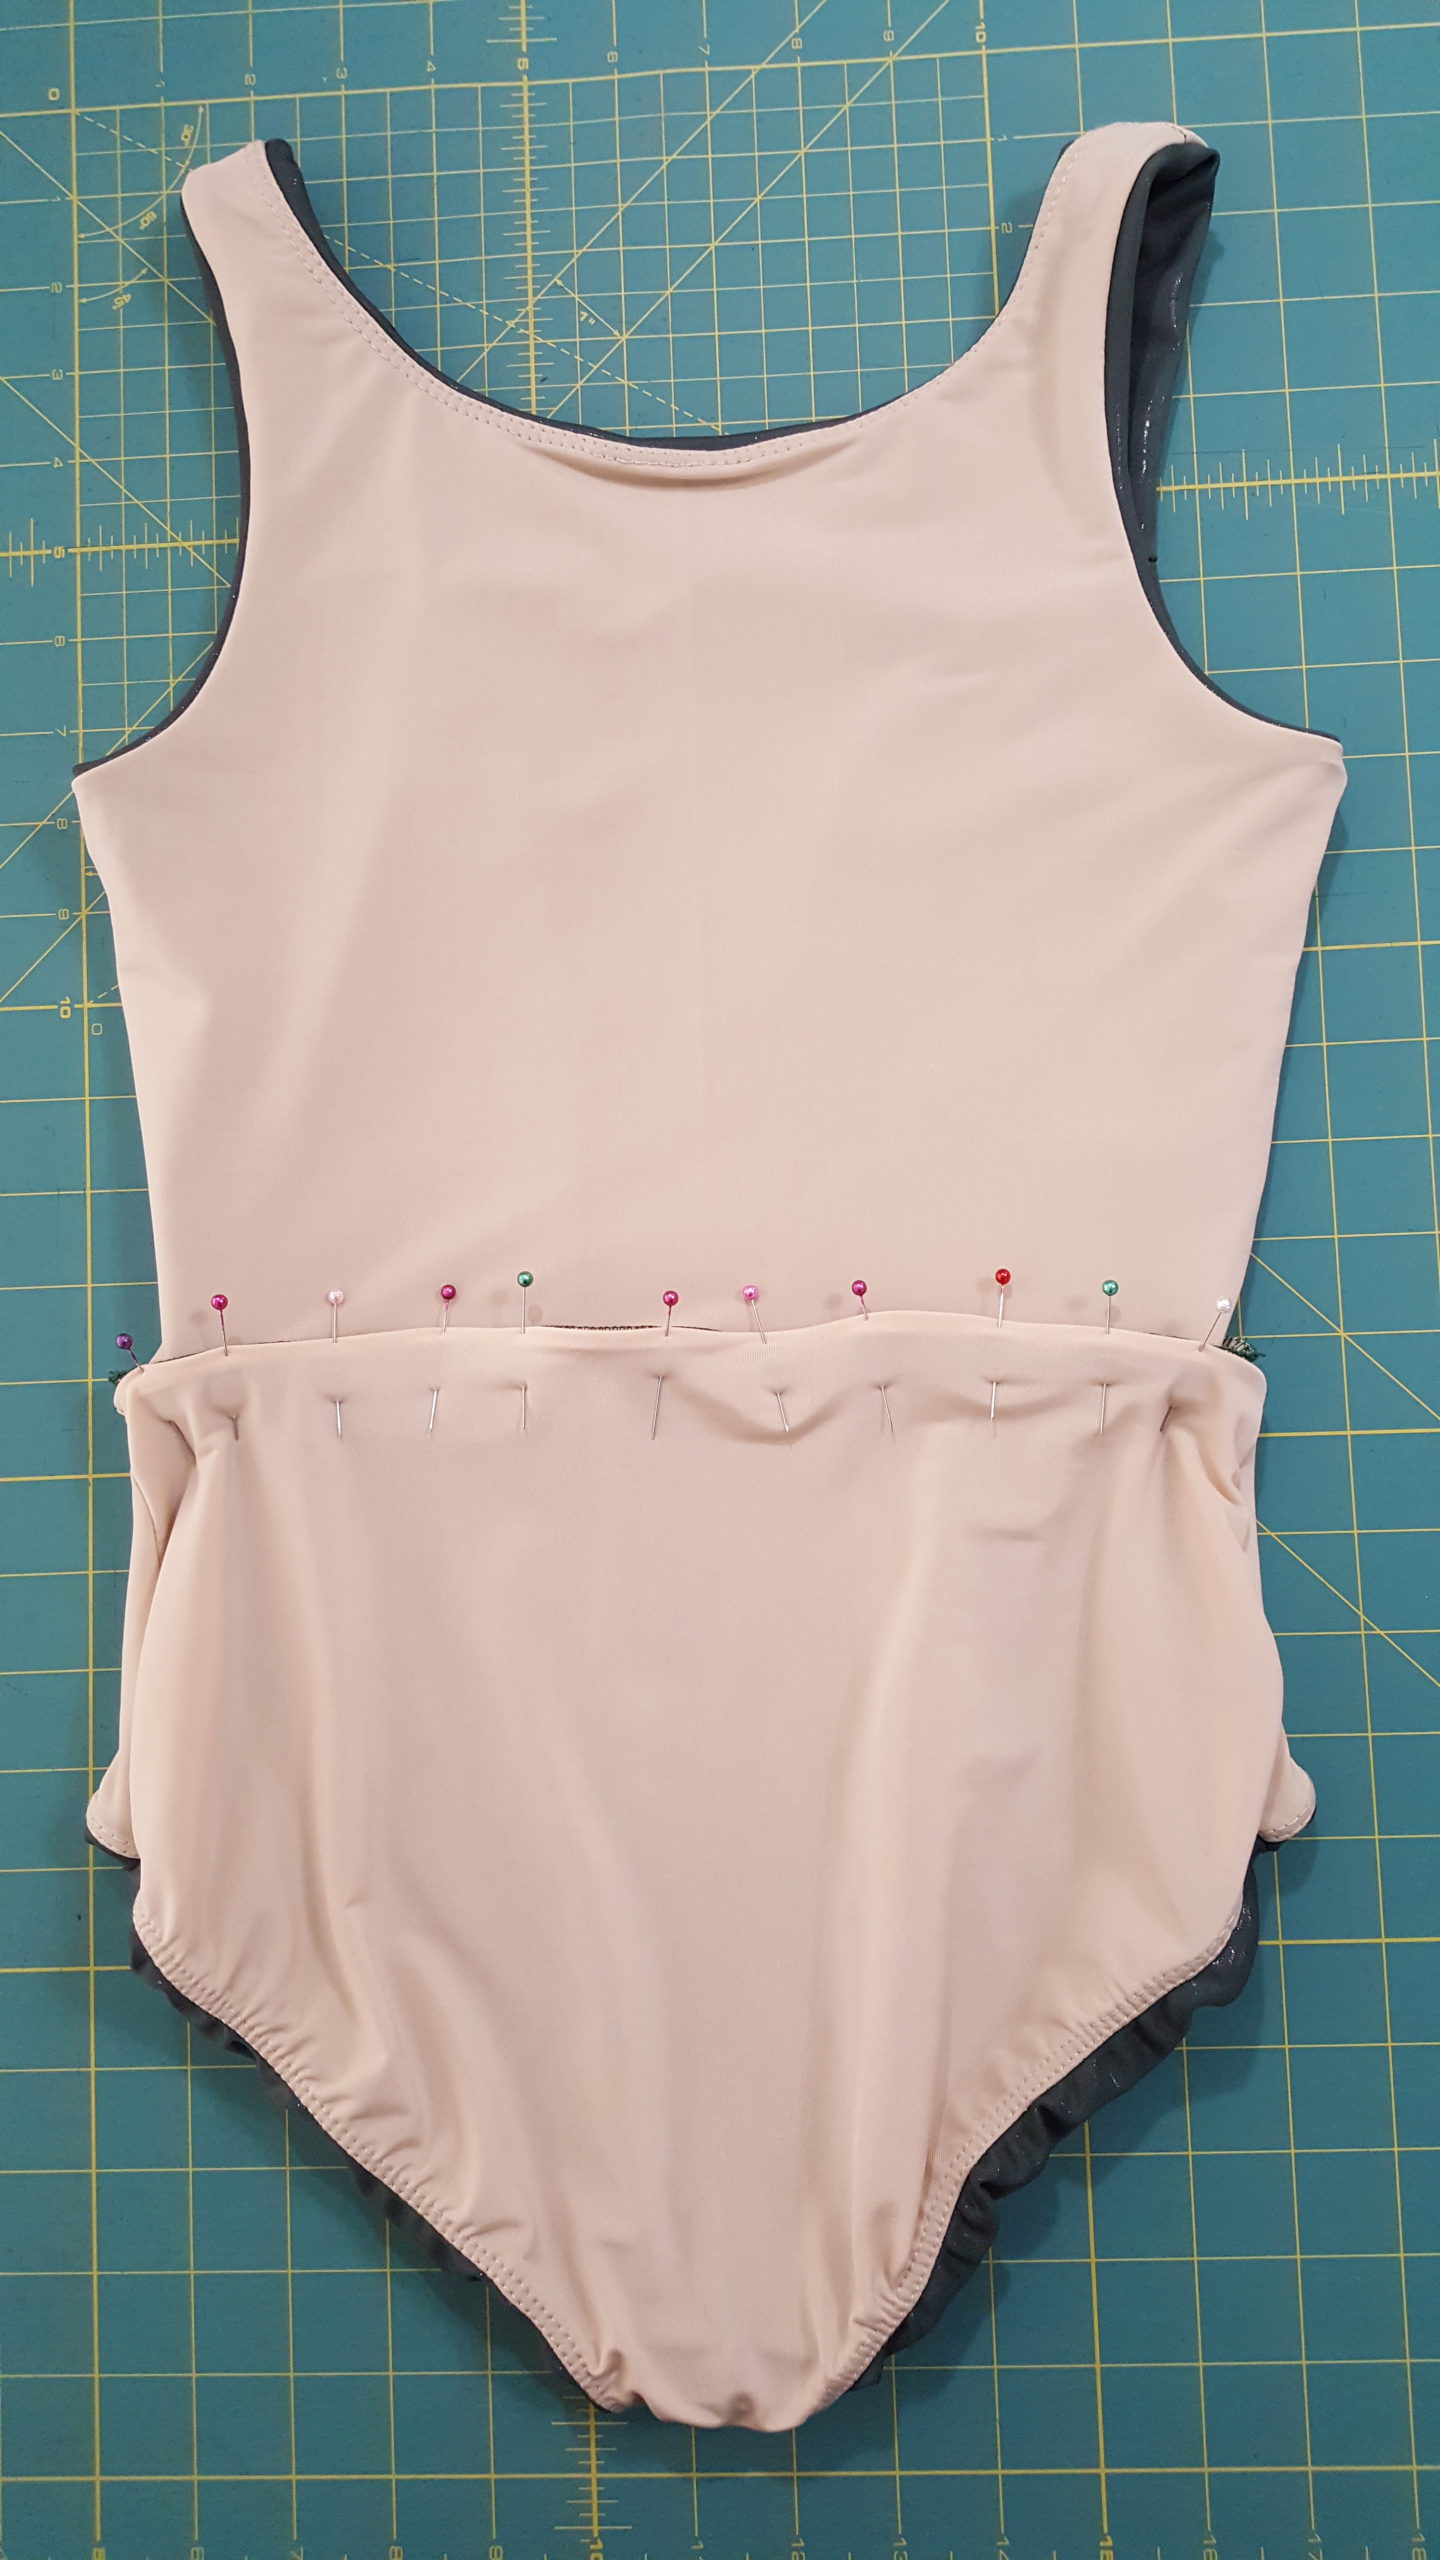
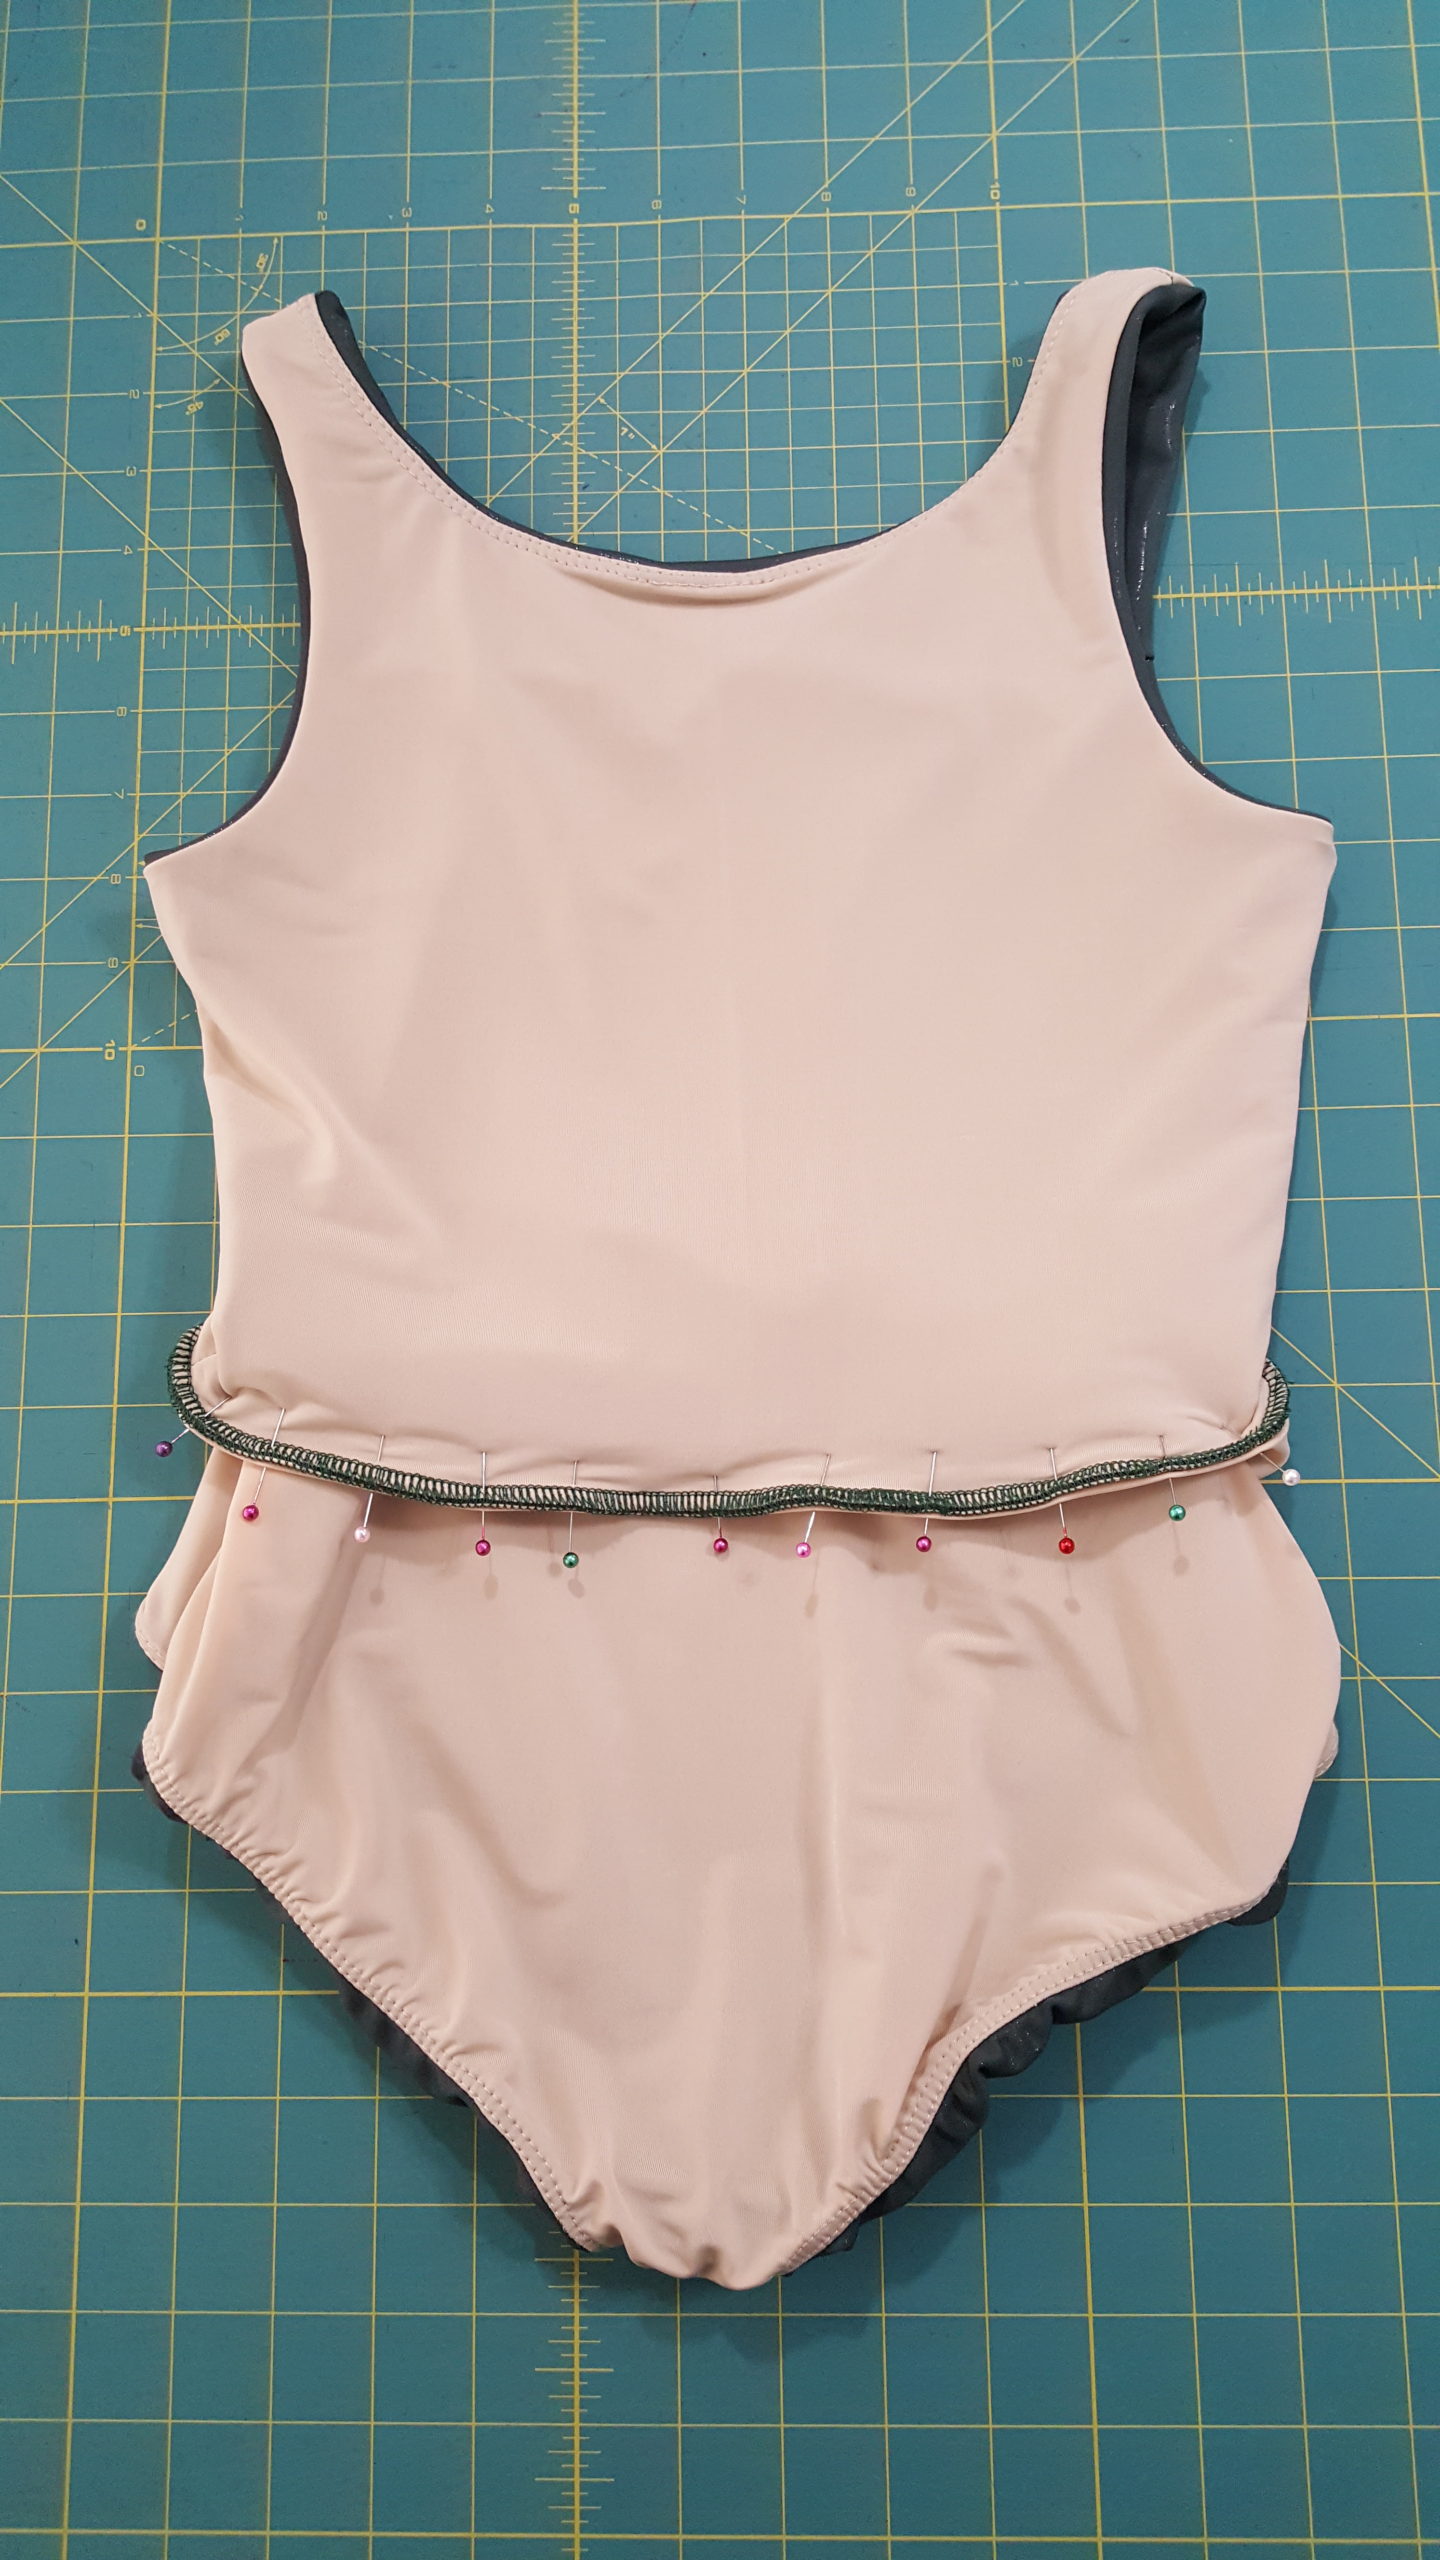
Sew the side seams 

We match up the elastic on the legholes, and we sew the side seams of the bottom. We do this on both sides, and then we sew the lining and the outside layers together on the top.

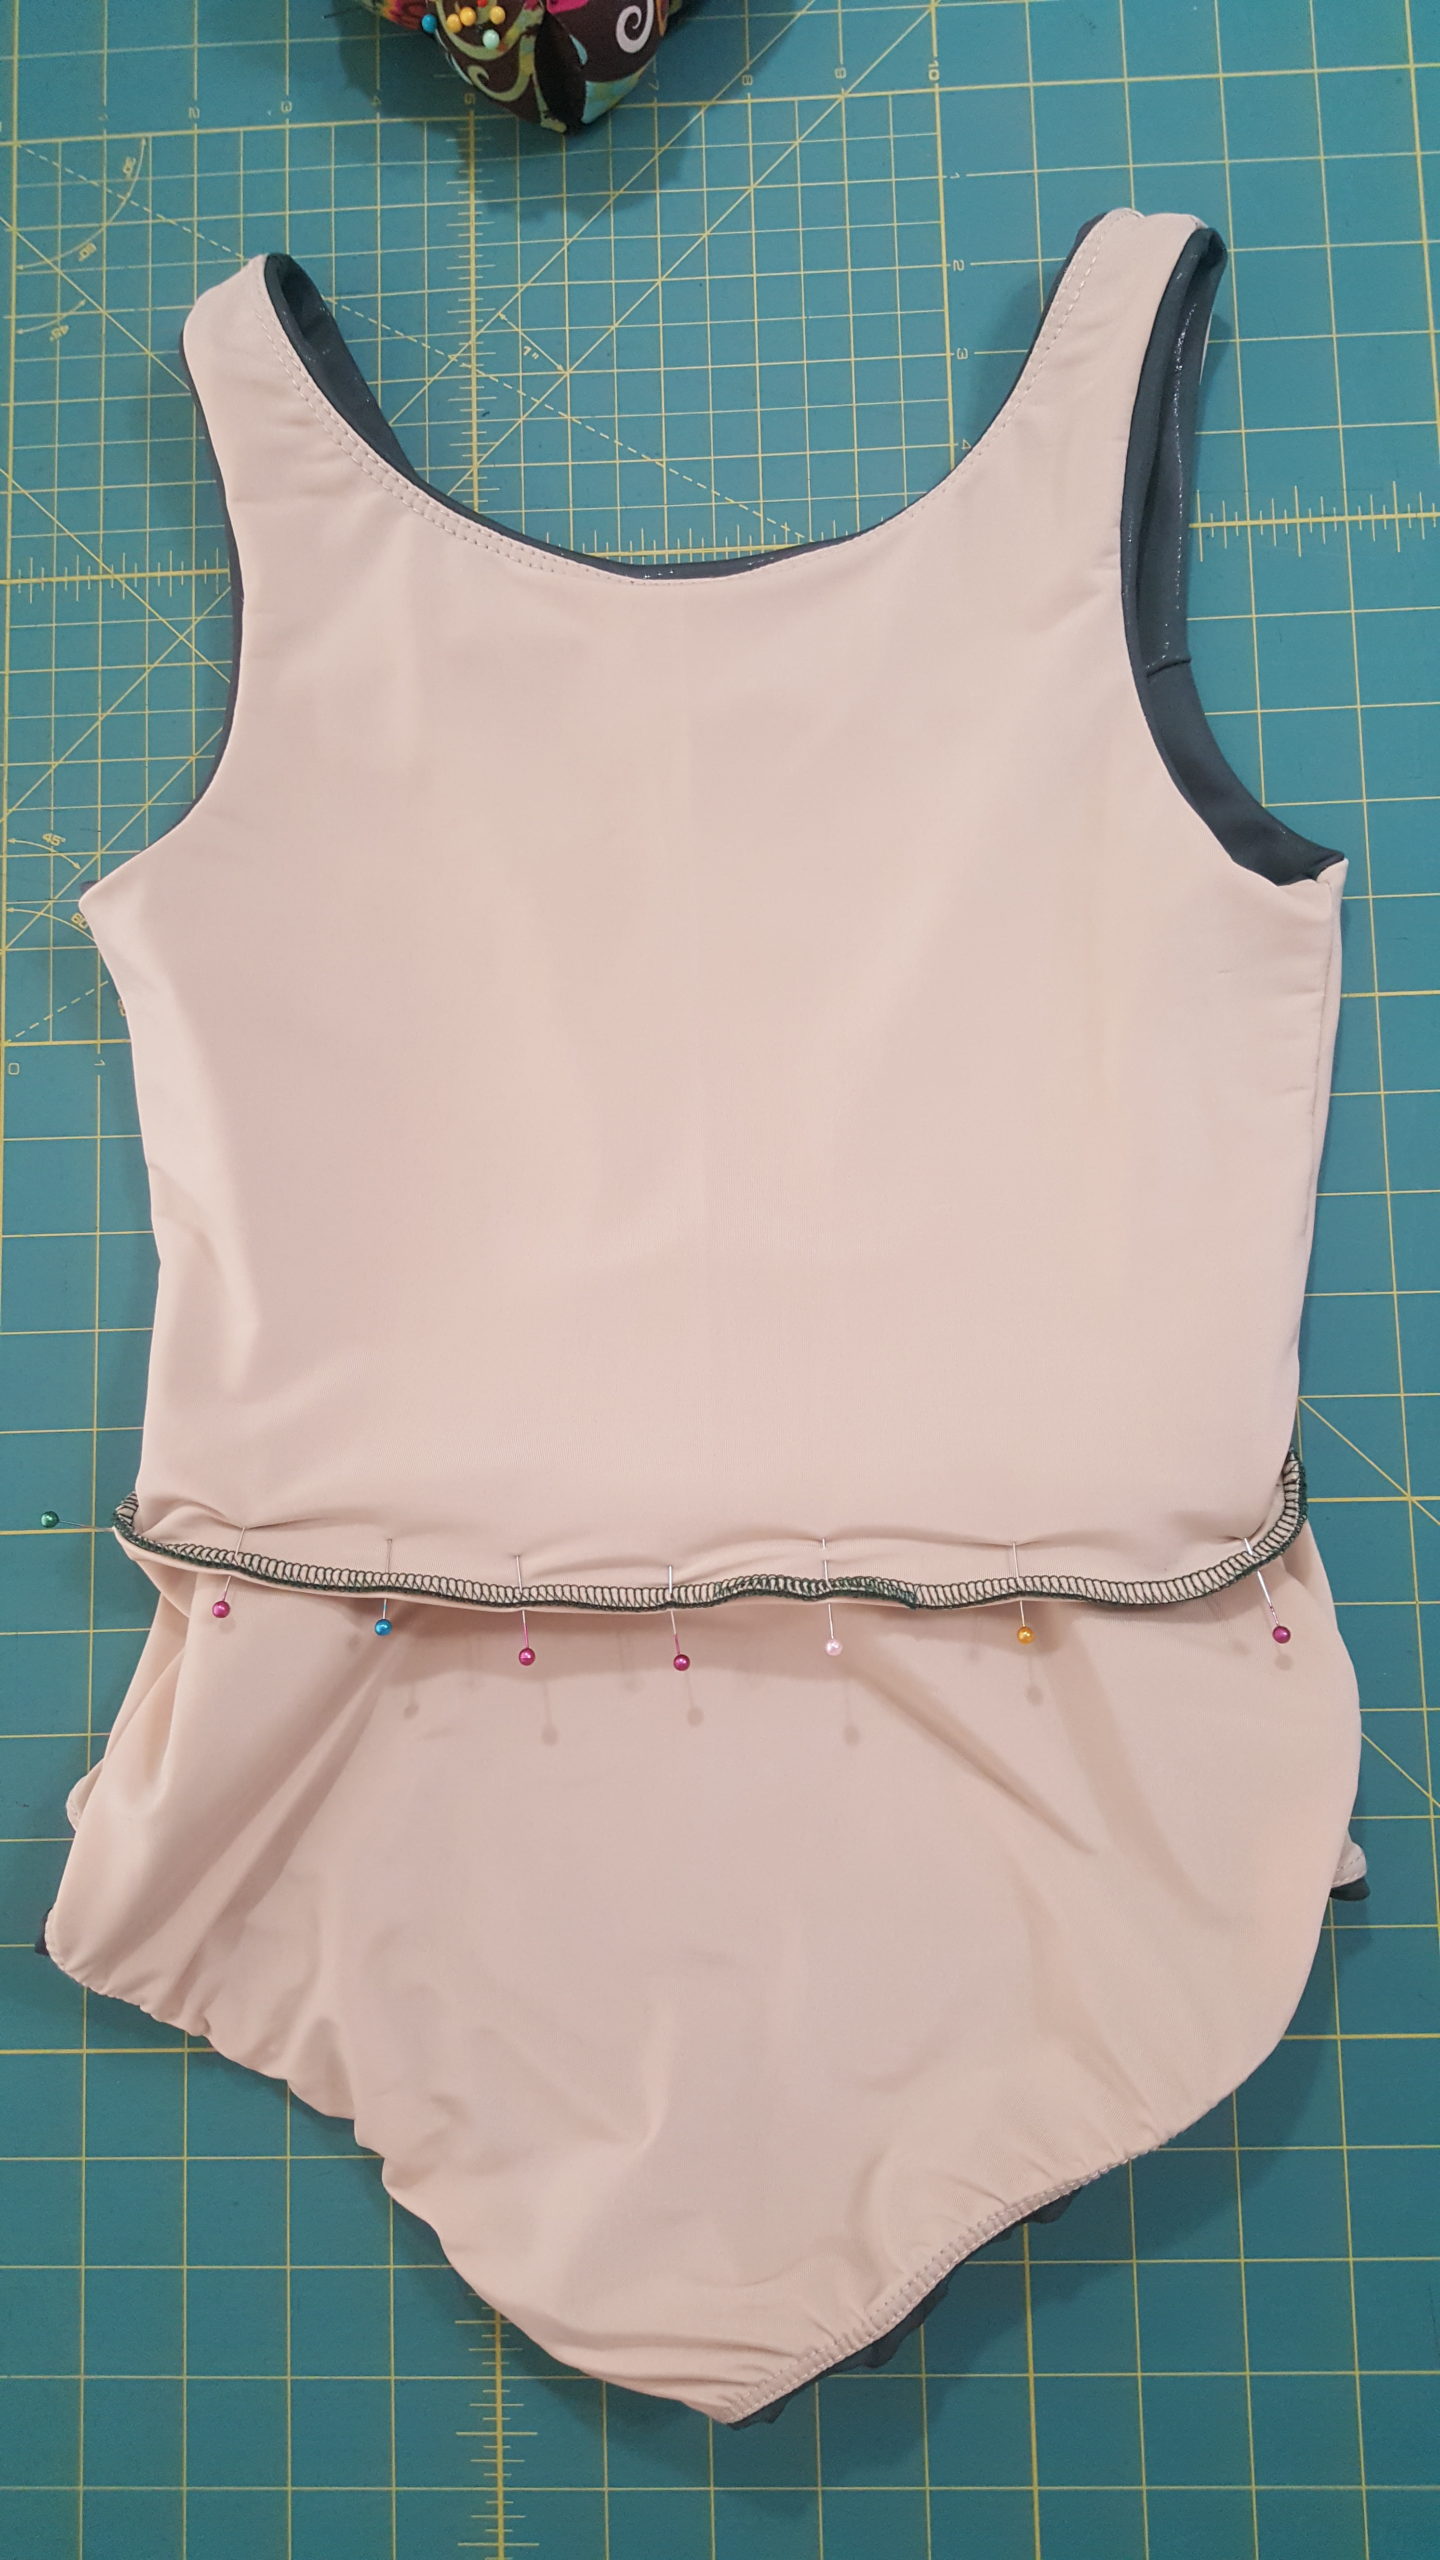
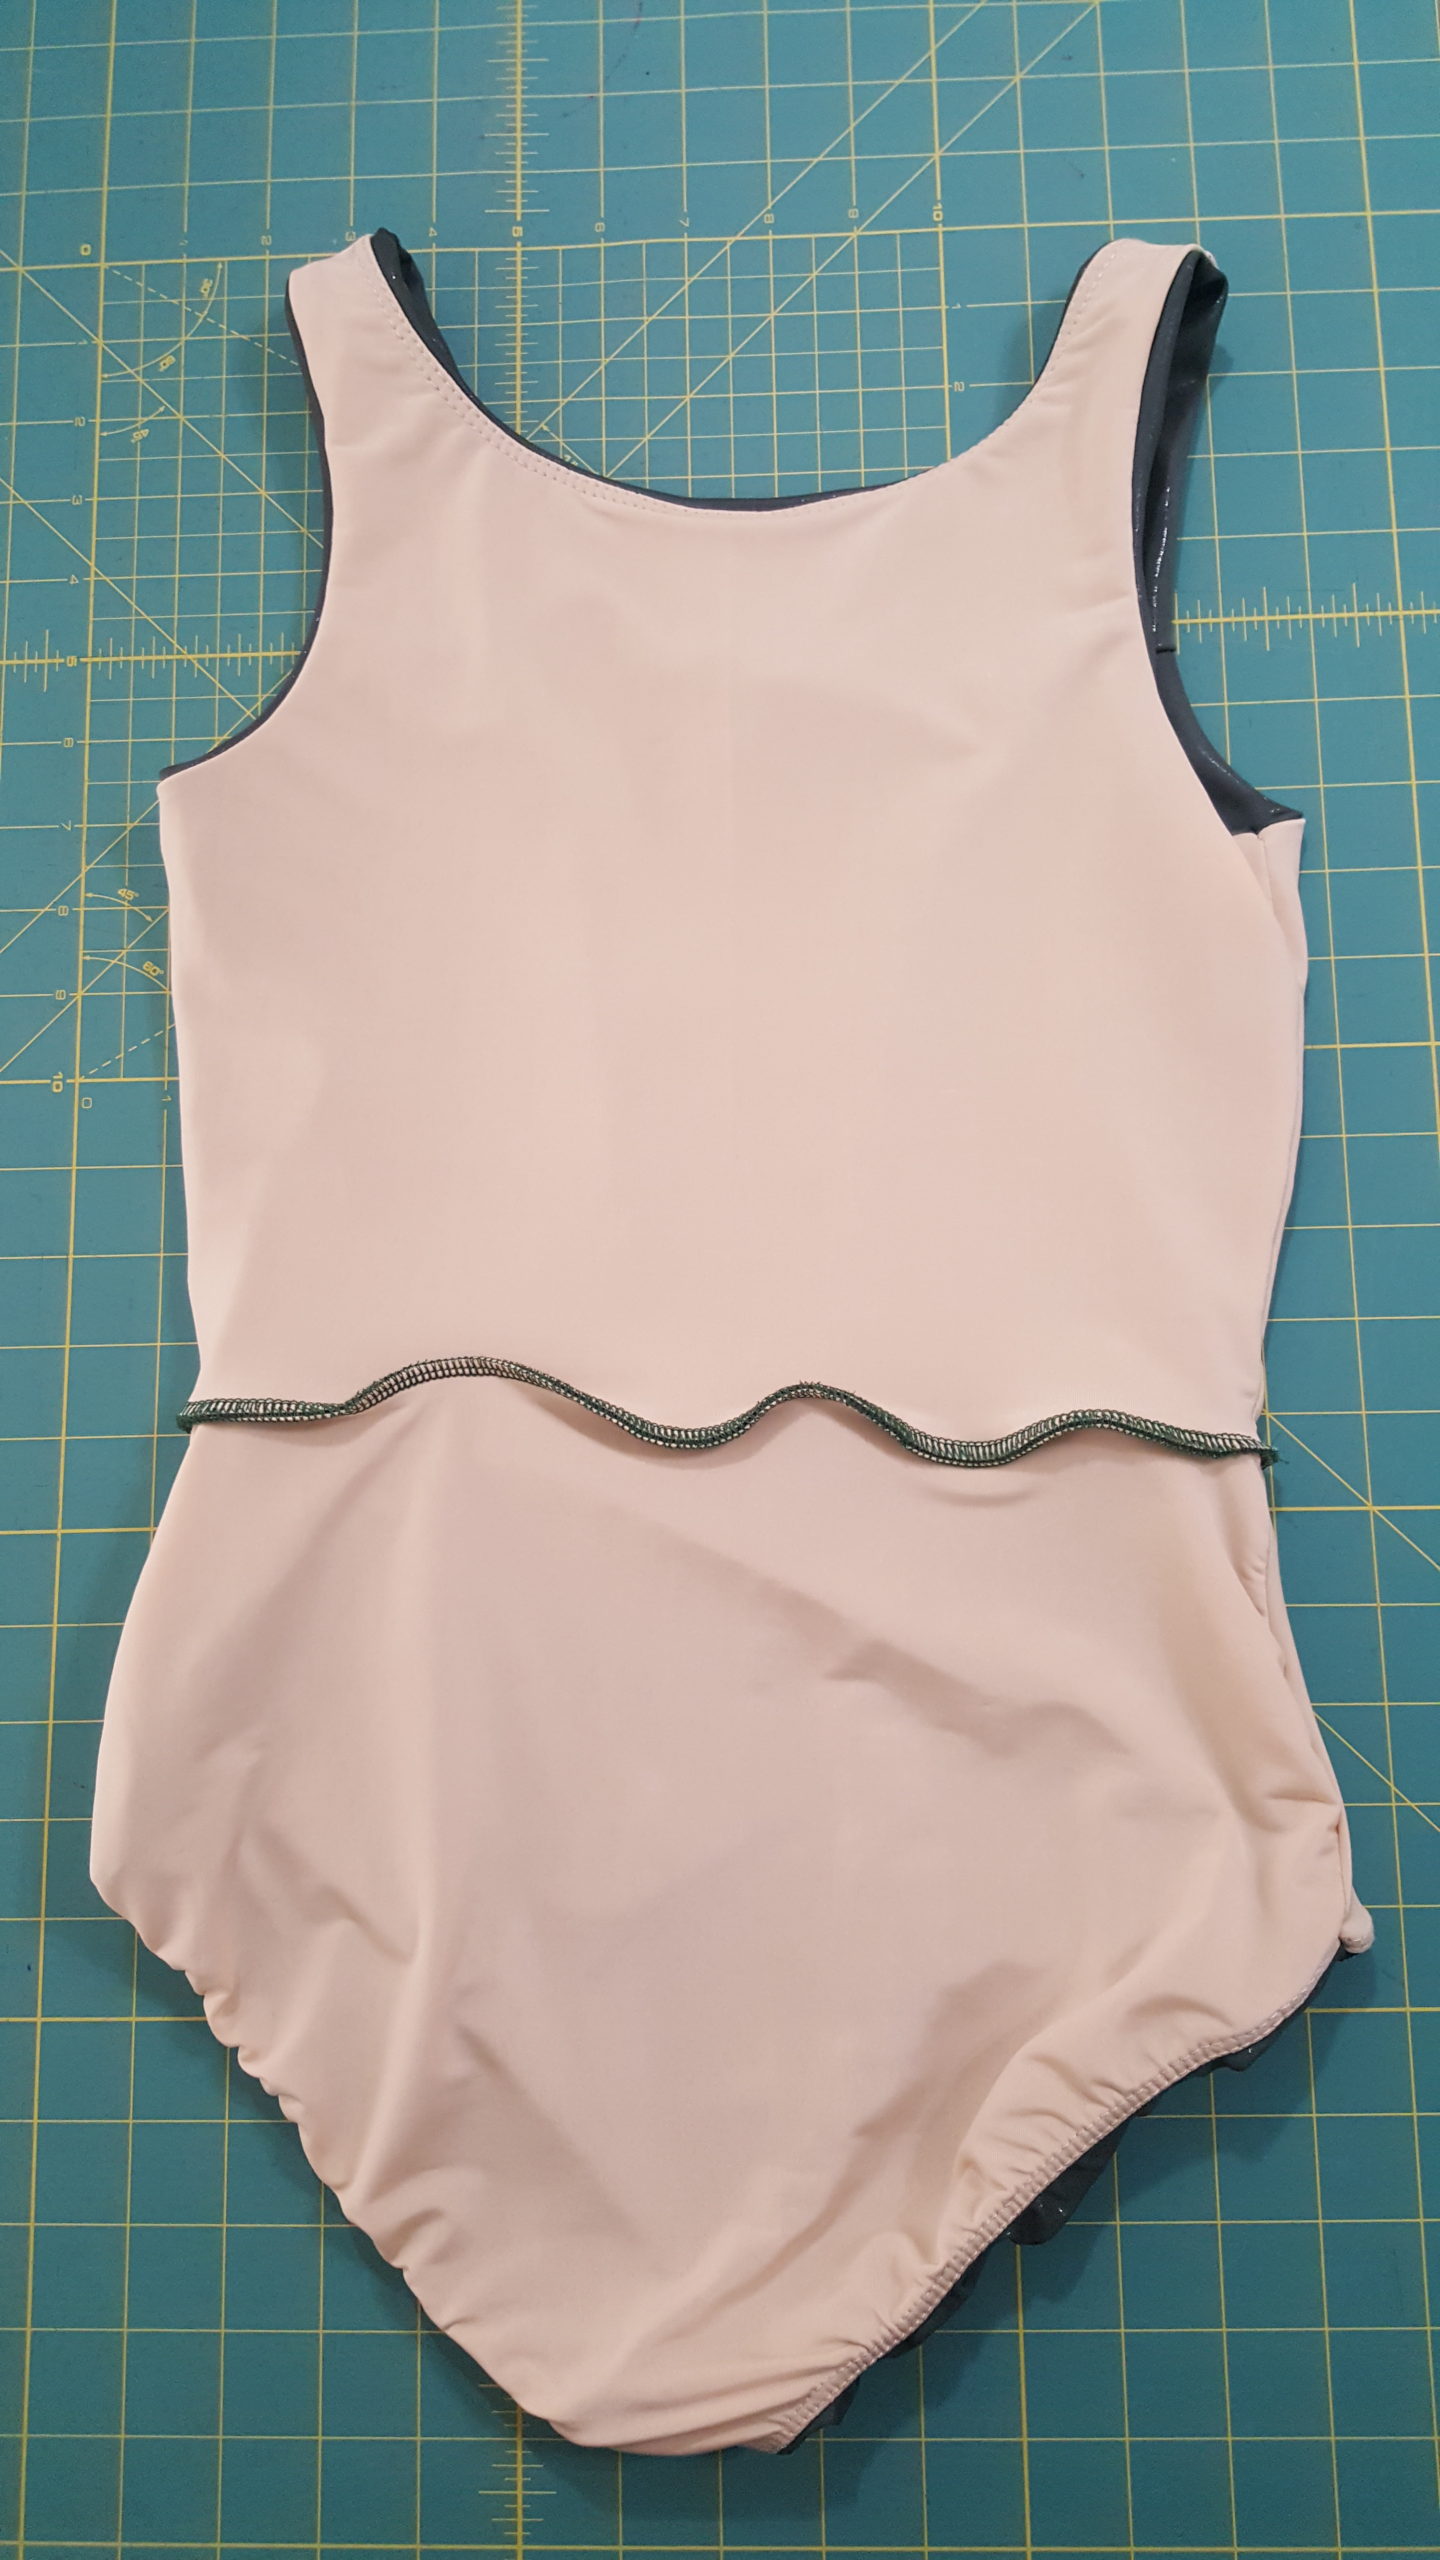
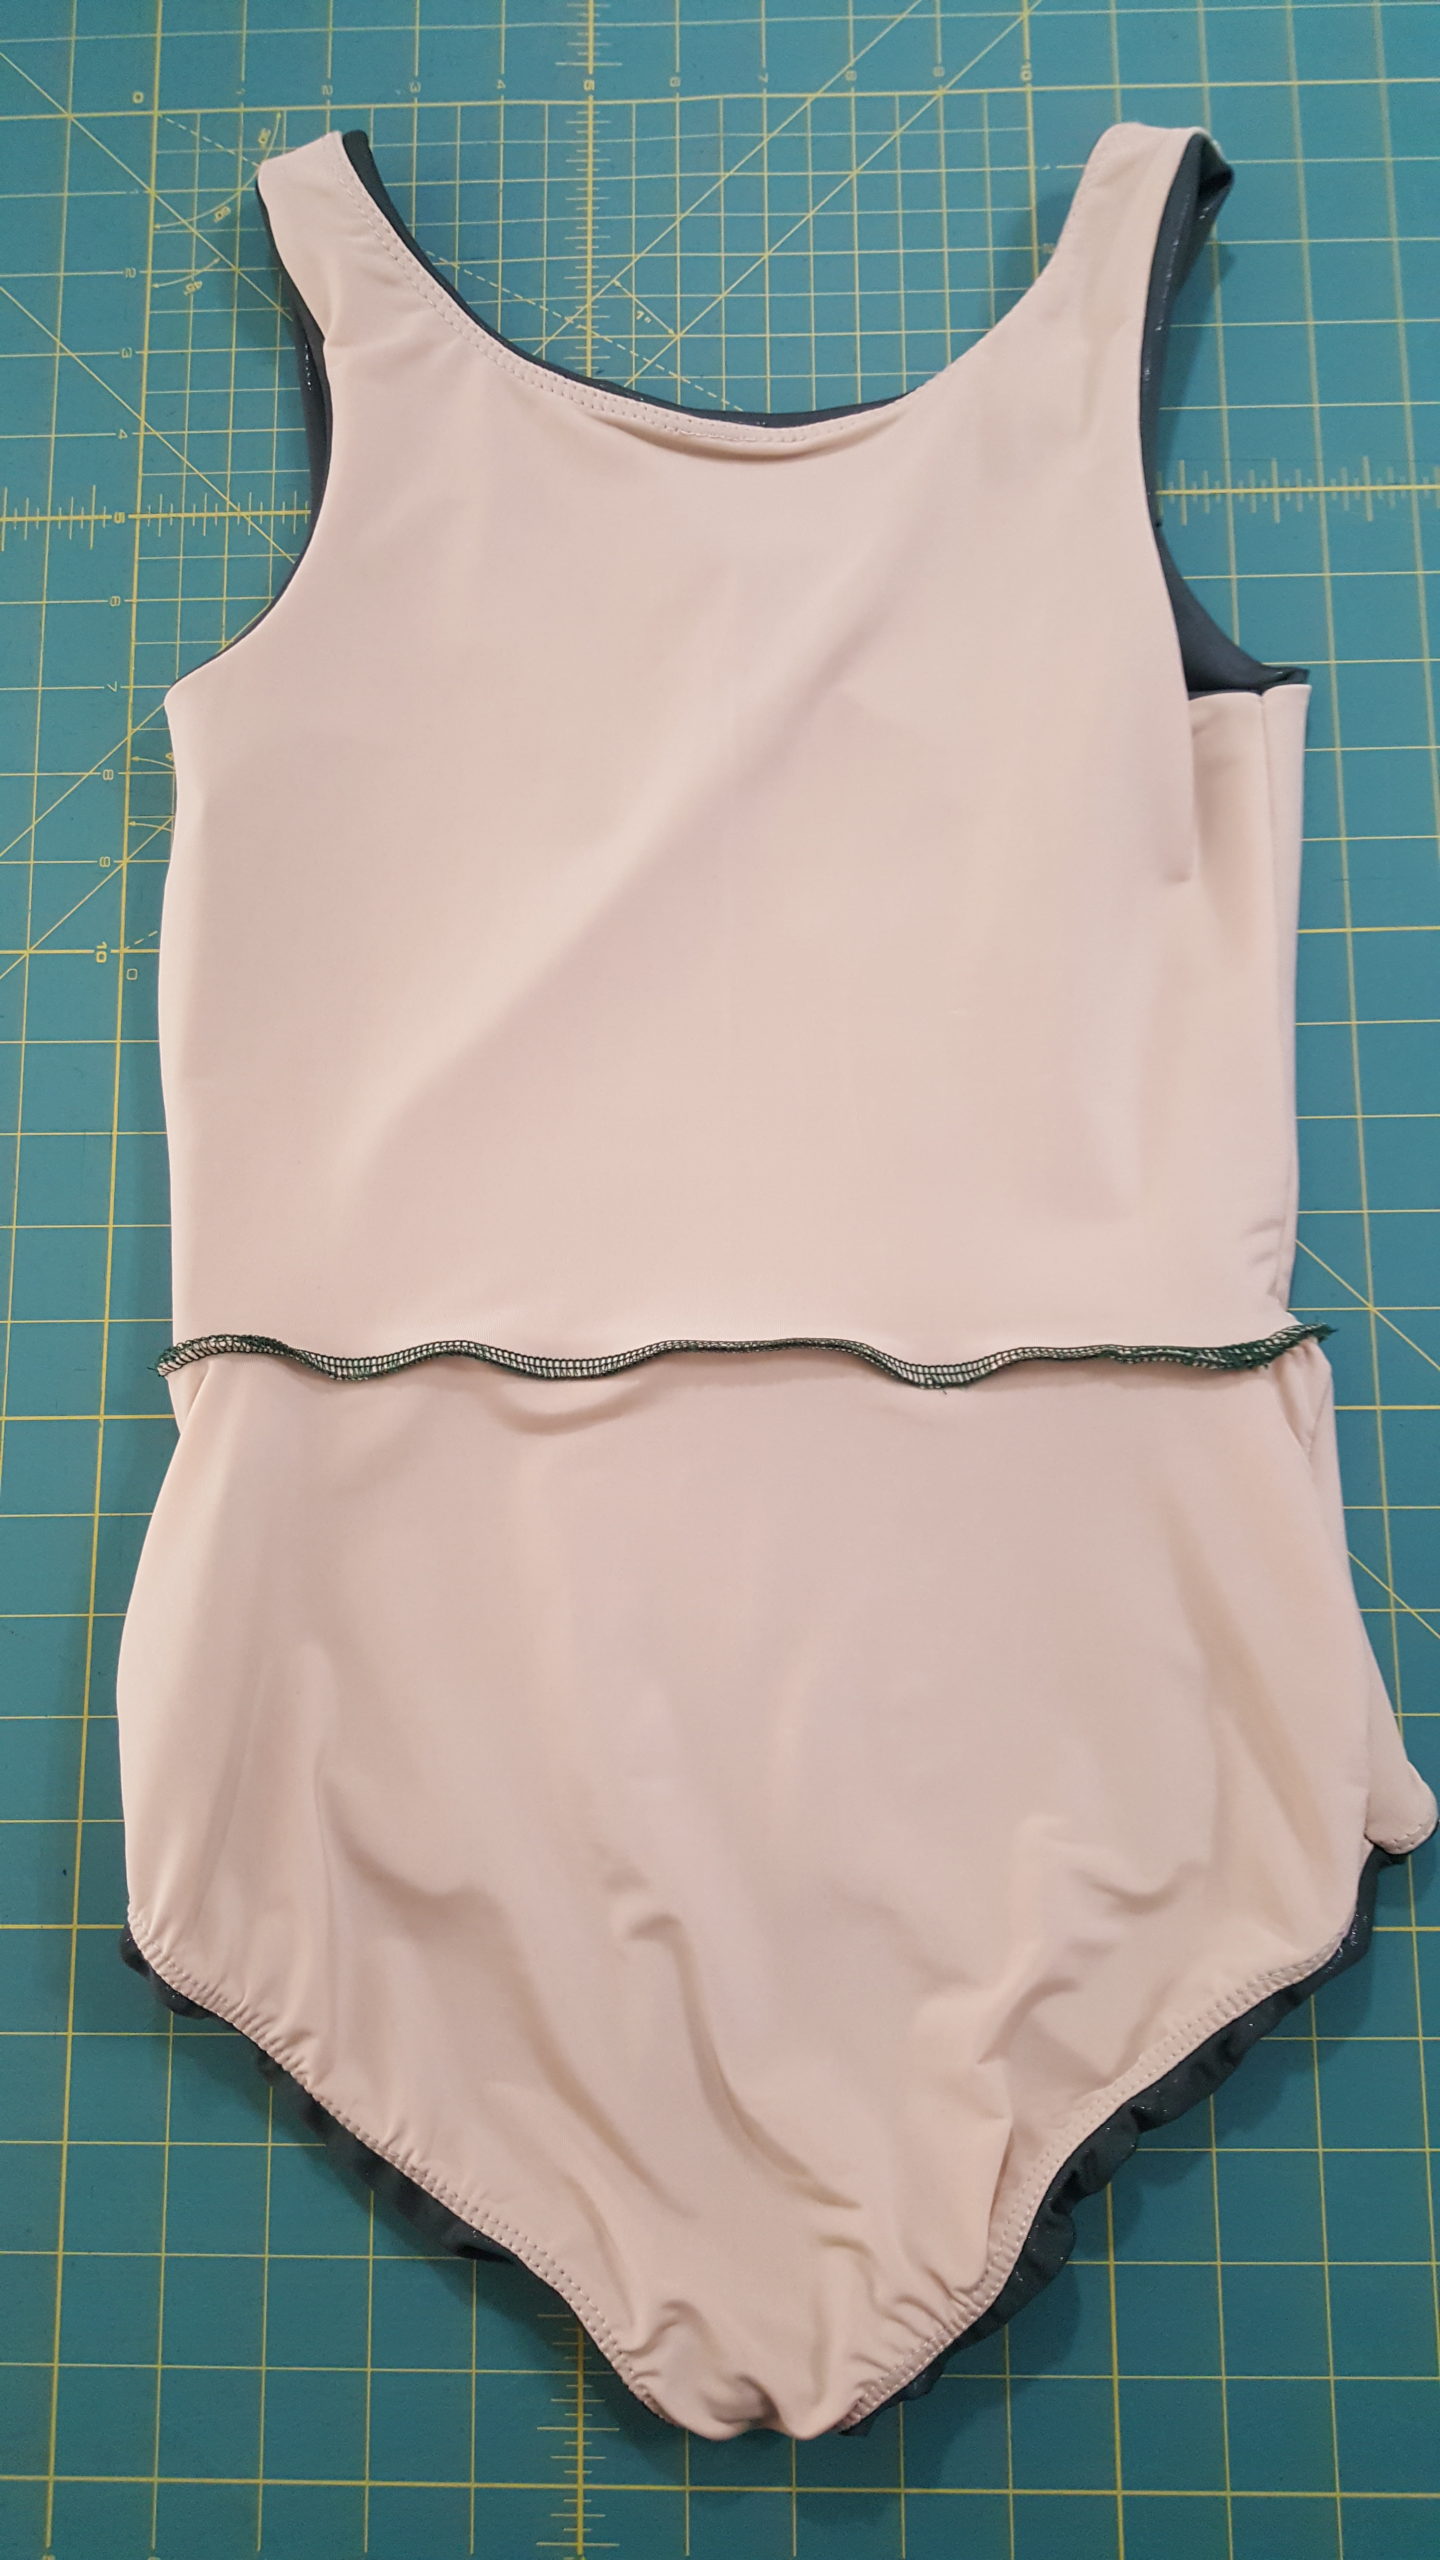
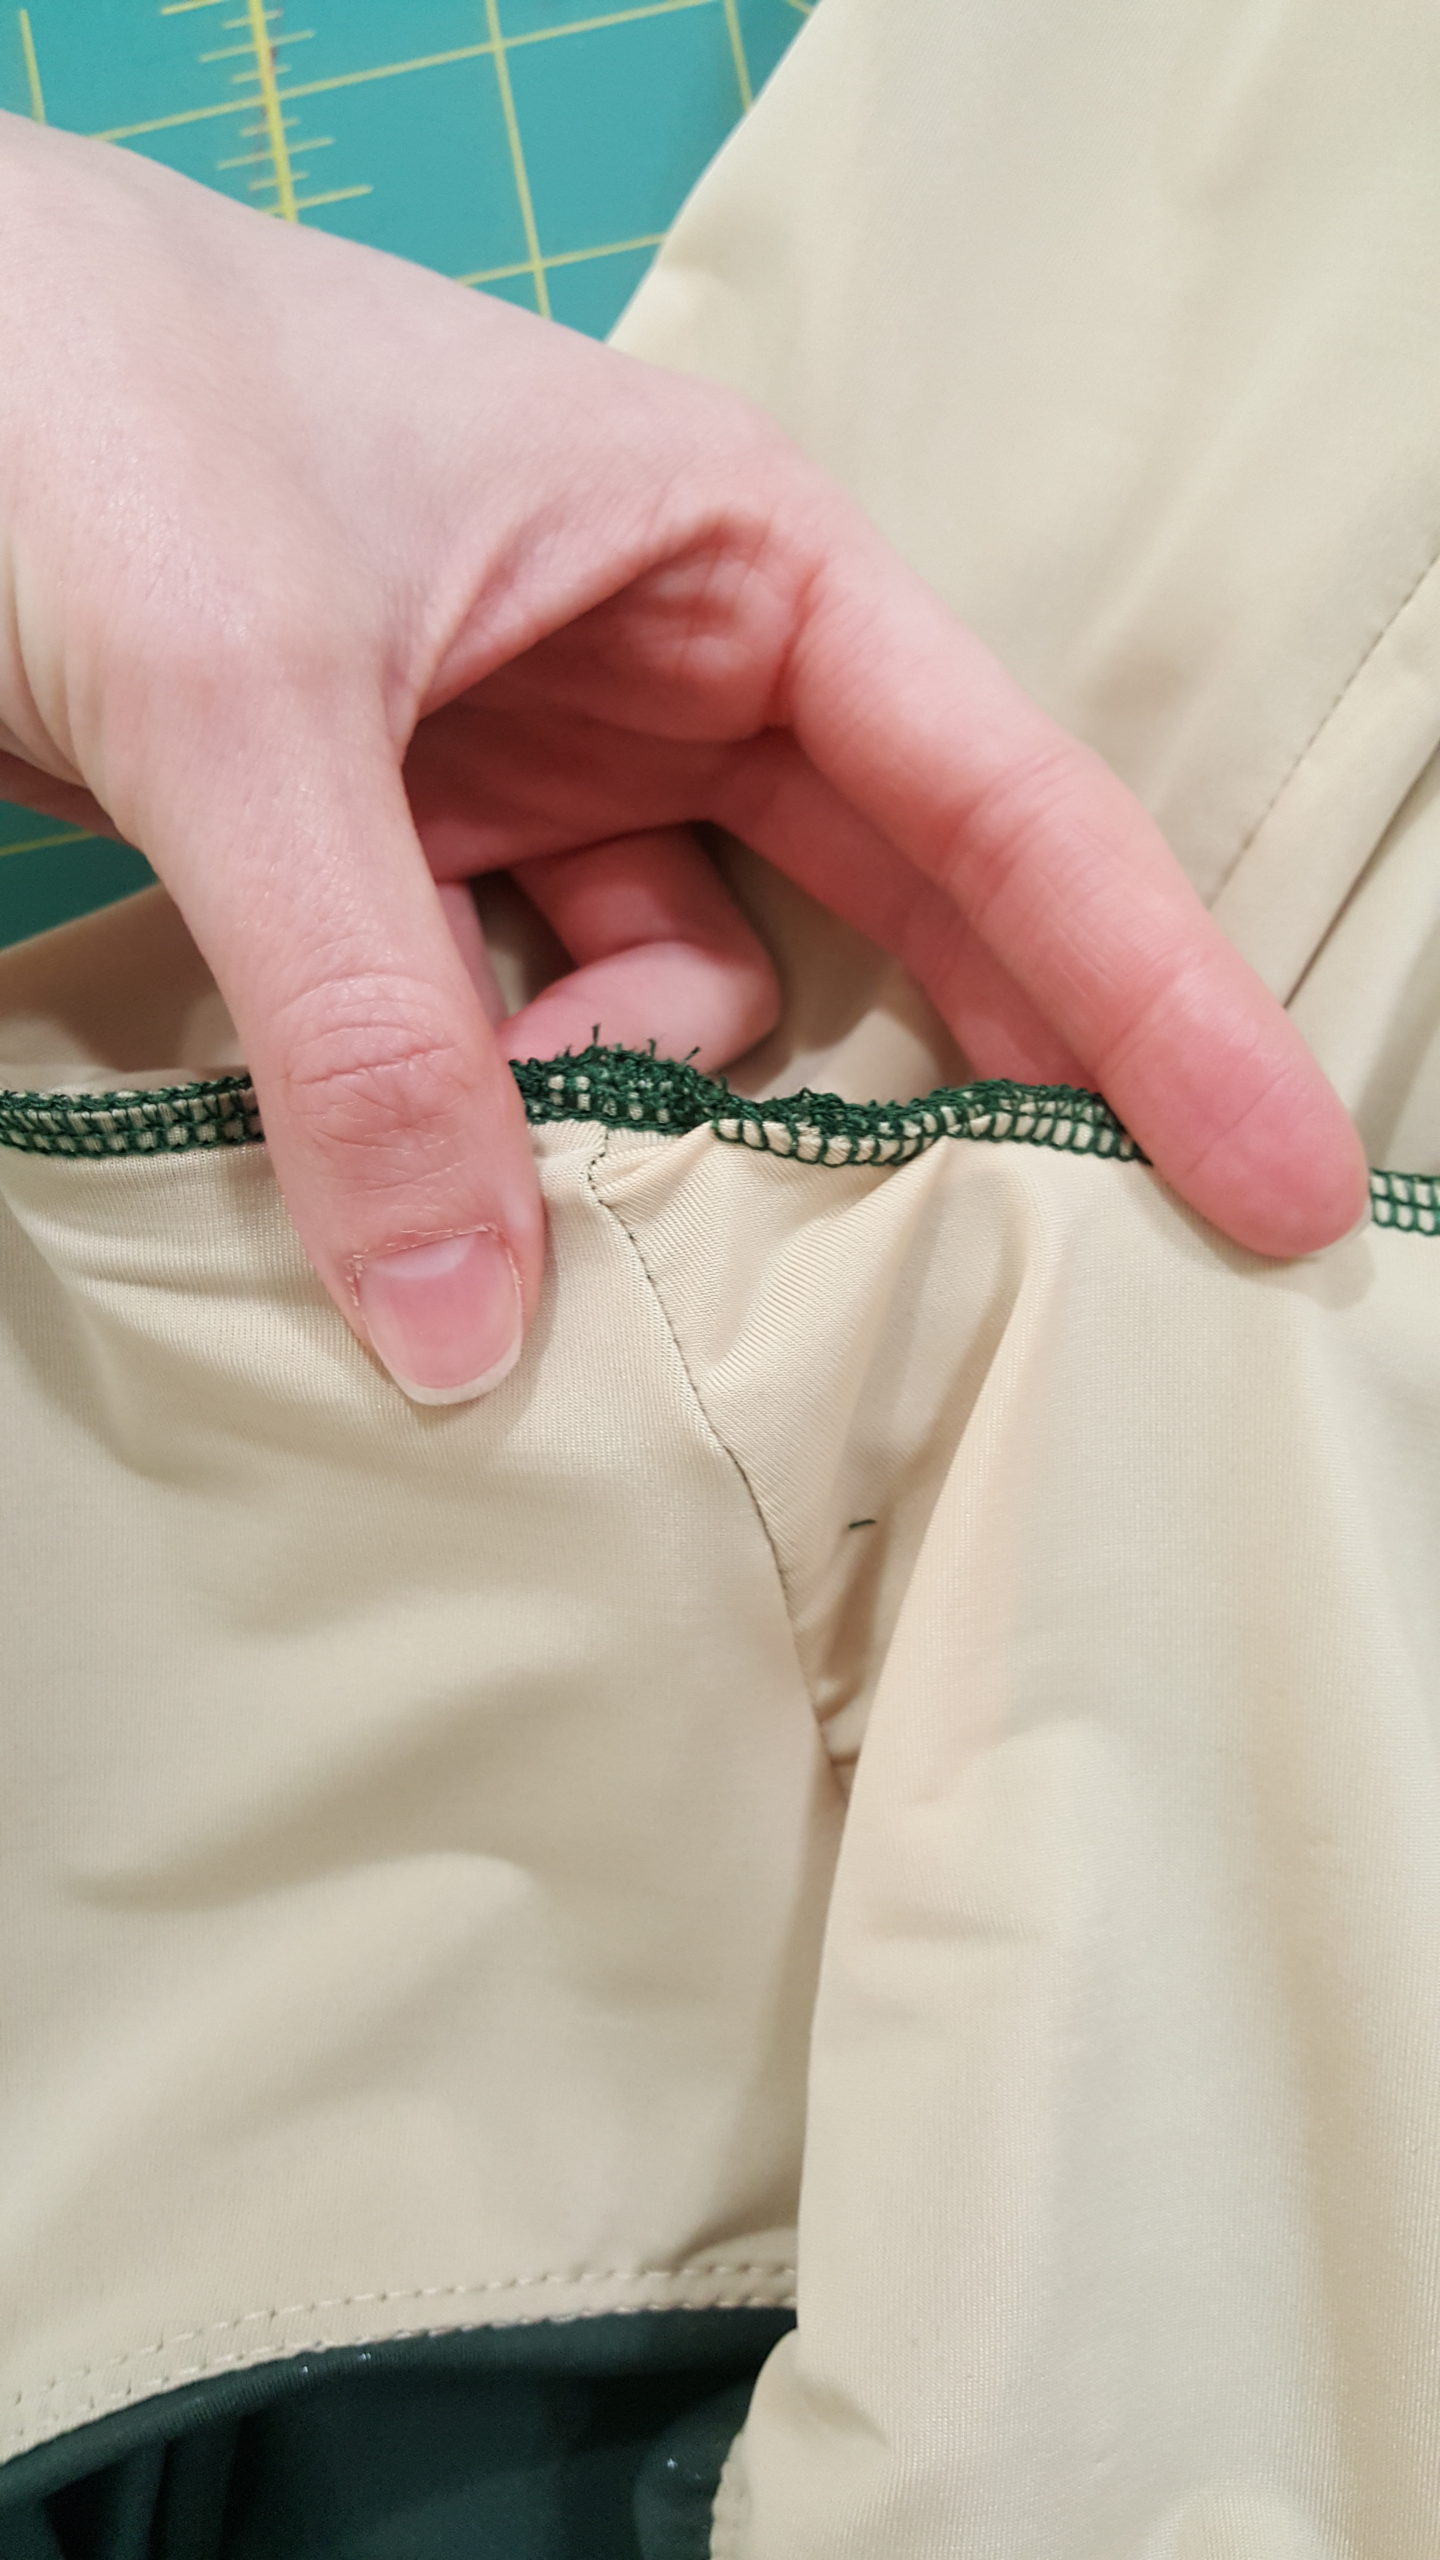
Sew the top and the bottom together

Now we have a full top piece and a full bottom piece! We fold the top piece inside-out over the bottom, and we sew the two serged edges together—and we’re done!!!

Once again, I’ve provided a visual—another video time-lapse. Click here to see the first time-lapse I made, which covers how to make a customized basic leotard pattern for you to use to design new leotards!

If you haven’t yet, you can sign up here for my free DIY Athletic Leotard Course. You’ll see everything in this video much slower, broken down with step-by-step instructions. Hope to see you inside the course! 😄 

Get Free Access to the DIY Athletic Leotard Course!

How to Make a Basic Leotard Pattern

How to Make a Basic Leotard Pattern

What is a basic leotard pattern?

A basic leotard pattern is not one that you actually cut out of fabric and sew into a leotard. It’s solely a paper pattern, and it goes all the way up to your neck in front and back, and it has sleeves. The important thing about this pattern is that it is custom-made with your body measurements, and with it you can design any leotard you like, knowing it will fit you just right. 

Why a basic leotard pattern?

If you’re going to go to the trouble to make your own leotard, you want it to fit well, right? Having a custom fit that is comfy and secure for your body specifically is one of the big perks of making your own dancewear. 

And the great thing is, unless your body measurements dramatically change (hey, you might wanna make a pregnancy leotard too), you only have to take your measurements and make your basic leotard pattern once. After that, you literally get to quickly trace it and start the fun part of designing your next leotard. 

Because you’ll keep your basic leotard pattern and trace it over and over, I recommend making it on thick poster paper so that it is durable and has a nice crisp edge that you can easily trace. 

It’s so worth it to take the time to get really accurate measurements and make this pattern for your body. It will save you so much time and will give you better results with every leotard you make from here on out!

I’ll explain more below, but here’s a time-lapse of this process because a visual will probably be helpful!

Take measurements

So the first thing we do is take our body measurements, and there are ten: Neck, Bust, Waist, Hips, Front Width, Shoulder Width, Back Length, Side Seam, Upper Arm, and Girth.

I can tell you right now that there are four measurements that people often get wrong the first time: the Front Width and Shoulder Width, and the Back Length and Side Seam. These measurements are super important because they help you get the proportions of your leotard pattern right so that your leotard will, in fact, fit your body. 

Don’t worry—in the DIY Athletic Leotard Course I give you tips for taking accurate measurements, and I also show you ways to make sure your proportions are correct and troubleshoot if they’re not.

Enter the measurements into your spreadsheet

Inside the DIY Athletic Leotard Course I give you a spreadsheet to put all your measurements into. You can decide whether to measure in inches or centimeters. 

The spreadsheet will automatically convert your measurements to centimeters, if they aren’t already, then take the right percentage of each measurement to account for the stretch of the fabric, then take the right fraction of each measurement depending on how you will use it to draft your pattern.  

If that sounds complicated, no worries—all you need to do is take good measurements, and then the spreadsheet will do all the math for you. 😊 

Make a leotard outline

Once we’ve got all our measurements, we start using them to draft our pattern! At this point we will ignore all the measurements on the left side of the spreadsheet, and only pay attention to the ones in the column on the right labeled “To Use For Pattern.” 

We start with half the Girth measurement to mark where the crotch is. Next we use Back Length to mark the waistline, Side Seam to mark the bustline, and Hipline 1 (a measurement the spreadsheet calculates for you) to mark the Hips. Already we should start to see whether our proportions look . . . you know, human. Ha! 😆 

Draft the top half

Now that we’ve got our outline, we use the Neck measurement to make the neckline, both front and back. By the way—we’re drafting the front and back of this leotard pattern at the same time! Which saves time and ensures that they match up perfectly. 👌

Next we use Shoulder Width to make our shoulder line, then Front Width and Bust to draft the armhole. 

This is the part where we really check out our proportions and test our measurements. We’ve now used those four troublesome measurements I mentioned—Front Width and Shoulder Width, Back Length and Side Seam. 

Start the sleeve to check measurements

Beside eye-balling it and seeing if we think our pattern looks proportional so far, I’ve found that a great way to test our measurement accuracy is to start the sleeve.

Something that often happens when one or more of those measurements is wrong is that the bustline ends up too high, and the armhole ends up too short, and that means that our sleeve pattern will end up wonky. 

What we need to do is make enough of our sleeve pattern to determine whether the armhole is as big or bigger than the Upper Arm measurement. Unless you’ve got Popeye-esque arms, you definitely want the armhole to be bigger. Even if you do have Popeye arms, it would probably be a bit uncomfortable to shove your big arm through a small hole.

As long as the proportions look good and the sleeve passes this test, we’re good to move on. If not, we may need to retake one or more of those four measurements and adjust our pattern until the sleeve looks right. 

Draft the bottom half

Especially if we had to do extra work to fix our pattern, the next part is nice and breezy.

We use our Waist measurement to do the side seam from the armpit to the waist, then our Hips measurement to draft the waist down to the hips, and give that line a slight curve.

We use our spreadsheet-calculated Hipline 2 measurement to help us get our pattern ready to draft the legholes. We also alter the crotch line so that our Leotard Front piece will be shorter and our Leotard Back piece will be longer. 

We draft the front leghole, which is a deep curve, and the back leghole, which is a much more shallow curve. And we’re really close to finishing now!

Separate Leotard Back and Leotard Front pattern pieces

At this point we’re ready to get a sharpie and outline Leotard Back. This is just to make it super clear which lines we should cut, and which lines are just there from the drafting process. (It sucks to do all this work and then cut on the wrong lines. Ask me how I know! Haha.) We cut out Leotard Back and trace it on the same paper. 

Now that we have a copy of Leotard Back, we can trace the neckline and leghole for Leotard Front and cut that out. Now we’ve got our Leotard Front and Leotard Back pieces. One more piece!

Finish sleeve

Finally, we go back to our sleeve pattern and finish the sleeve cap. We label all three pieces, and now this basic leotard pattern is ready to be used to make endless comfy, custom-fit, secure athletic leotards!! 😄 

Now what?

This process of making a basic leotard pattern is day 1 of my free DIY Athletic Leotard Course. As I said, you can trace this pattern to start designing a leotard to sew, and that is precisely what we do in day 2 of the course. And day 3 is where we finally cut out our fabric and sew it into a leotard! 

Assuming you read this much of this post, it’s probably safe to say that this free course is for you (or maybe you just really like reading? 😉). The course breaks all this down into so much more detail, step-by-step, so you know exactly what to do and can get a good result. If you haven’t already, you can sign up below! 

Get Free Access to the DIY Athletic Leotard Course!

4 Reasons You Should Make Your Own Leotards

4 Reasons You Should Make Your Own Leotards

Alrighty. We’ve established that typical leotards are unsatisfactory. Now let’s talk about why leotards that YOU make can be awesome.

1. You can make comfy leotards

In my last post, I shared how typical leotards leave lovely, red, itchy indents in your skin after not much time at all. These pictures were taken about a half-hour after putting each leotard on.

After wearing a spaghetti strap leotard for about a half hour
After wearing a typical leotard for about a half hour

But check this out!

Here are my shoulders after wearing a Tia’s Leos leotard for about 4 hours:

Eh??

Instead of weird bits of fabric and scratchy stitching on the inside of your leotard, you can make leotards completely lined with silky stretchy fabric and smooth, straight stitching.

2. You can design leotards with the support and coverage YOU need

Everyone probably has different amounts of coverage they want/need in a leotard. Maybe you’re bigger chested and need more support. Maybe you want a leotard that can cover a sports bra. Maybe you’re a cold person so you like longer sleeves, or a warm person so you prefer no sleeves. Maybe you have religious beliefs that lead you to want to cover more of your body. Whatever your situation, if you make your own leotards, YOU decide how much coverage and support they provide.

3. You can decide what your leotards will look like

K this part is really fun!! Do you have ideas about what you’d like your leotards to look like? Do you have a certain color you need for a class, or a favorite color you’ve never gotten to wear for dance? Have you seen a leotard style you liked, but you hated the color, or vice versa? This is where you get to pick and choose some elements you like and find yet another way to channel your inner creativity and artistry.

4. You have me to teach you how to make your leotards 😄

You might read this and think, “Well that sounds great, Tia, but I don’t know the first thing about sewing, let alone designing a leotard.”

This is the part where I try to decide whether I need a big sign, or a sticker on my forehead, or . . . 🤔

K, now that I’ve reintroduced myself 😉, my final reason for you to start making your own leotards is that you don’t have to do it by yourself or start from scratch. You’ve got me!! I’ll hold your hand through it! And, you can get started and make your first leotard with me for free!!!

If you haven’t signed up yet, don’t wait any longer! I’ve made it as easy for you as I can in this course, and I can’t wait for you to see how satisfying it is to make a leotard for yourself that fits YOUR body just right, that is silky smooth and comfy inside and outside, is colors you chose . . . and that you can’t wait to wear next time you dance. 😊 

Get Free Access to the DIY Athletic Leotard Course!